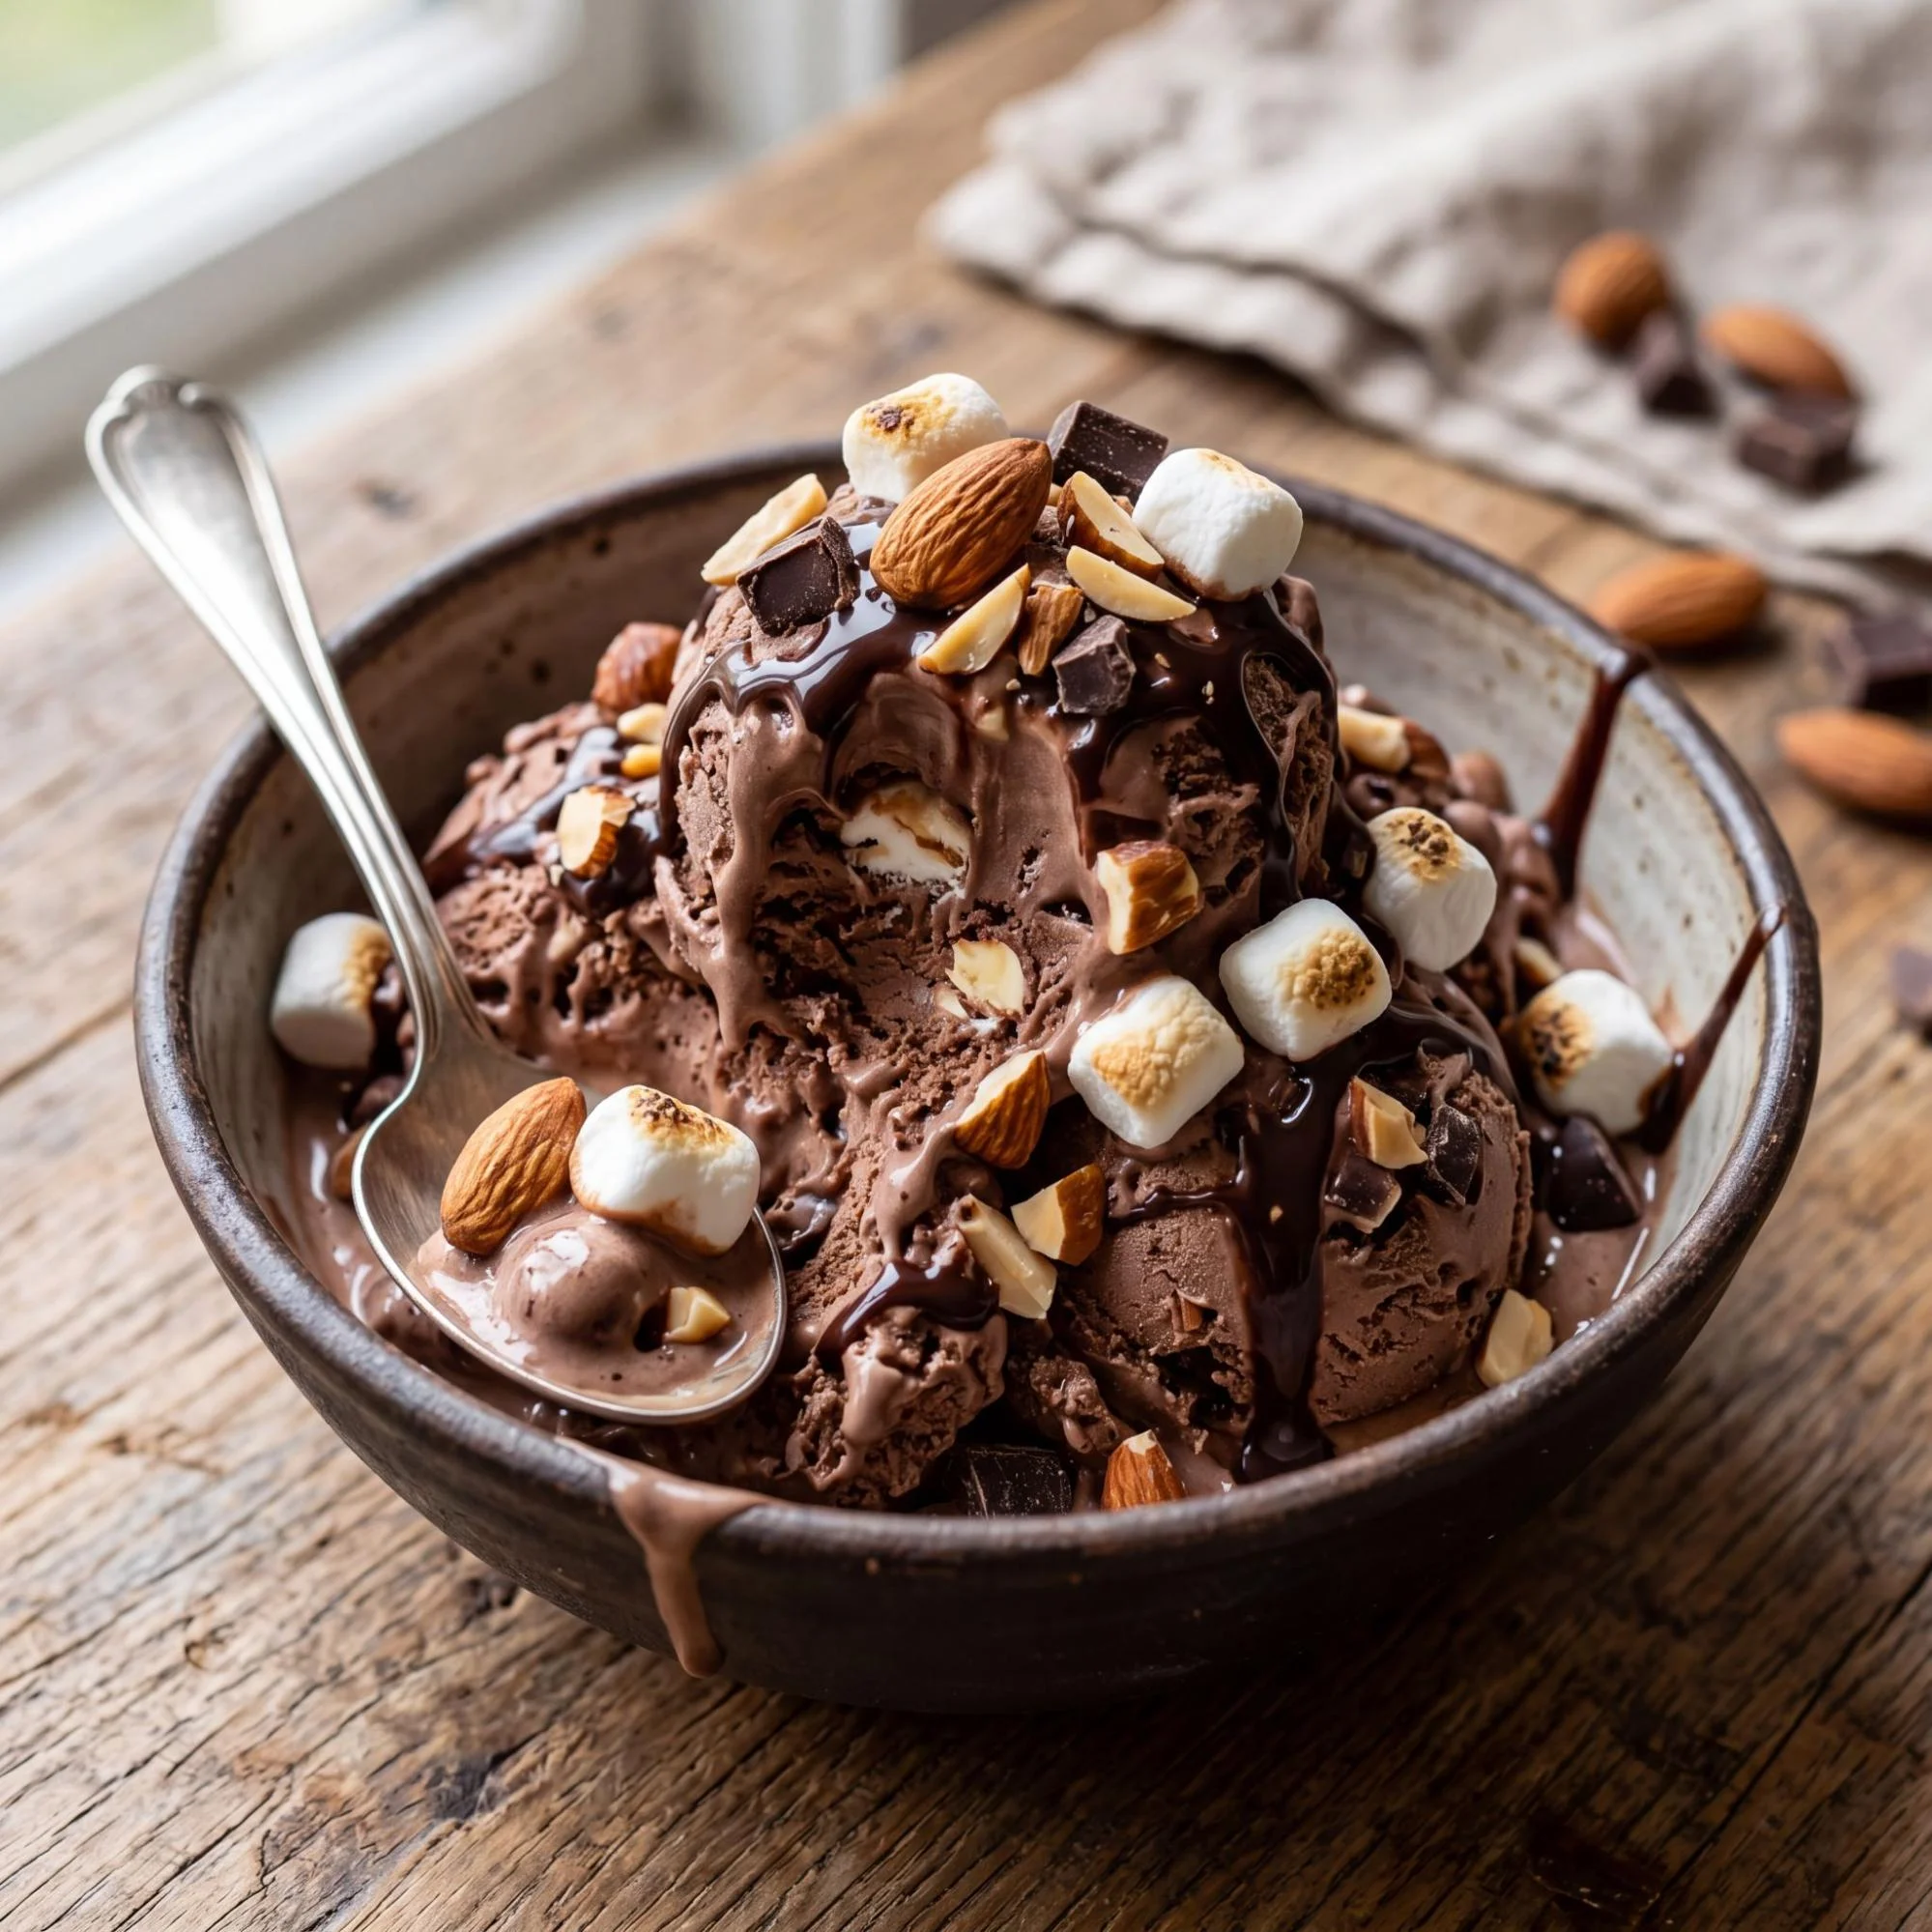
Easy Homemade Rocky Road Ice Cream Recipe
There’s nothing quite like a bowl of homemade ice cream on a warm day. The rich, creamy texture combined with the perfect blend of sweet and salty toppings makes every scoop a joy. This homemade Rocky Road Ice Cream is a decadent dessert that combines chocolate ice cream, marshmallows, and nuts for a treat that’s a little bit crispy, chewy, and creamy all at once. It’s incredibly easy to make at home, and once you’ve tasted it, you might never go back to store-bought again!
In this article, we will guide you step-by-step to create the ultimate homemade Rocky Road Ice Cream. Let’s get started!
Why Make Rocky Road Ice Cream at Home?

Making your own ice cream has so many benefits:
- Fresh and Customizable: You can control the flavor, sweetness, and texture to your liking. Add extra marshmallows or more nuts if that’s your preference.
- No Artificial Additives: Homemade ice cream is free from artificial preservatives and chemicals commonly found in store-bought versions.
- Fun to Make: It’s a fun and rewarding project. You’ll love the joy of creating a frozen treat that everyone will enjoy.
Ingredients for Easy Homemade Rocky Road Ice Cream
Making homemade ice cream doesn’t require a lot of ingredients. Here’s what you’ll need for the ultimate Rocky Road experience:
- 2 cups heavy cream
- 1 cup whole milk
- 3/4 cup sugar
- 1 teaspoon vanilla extract
- 1/2 cup mini marshmallows
- 1/2 cup roasted almonds (or any nuts of your choice)
- 1/2 cup semi-sweet chocolate chips or chopped chocolate
- 2 tablespoons unsweetened cocoa powder (for a richer flavor)
- A pinch of salt (optional)
These simple ingredients are all you need to create a creamy base and add delicious Rocky Road elements. If you have an ice cream maker, this recipe will be even easier to prepare. But don’t worry, we’ll show you how to make it without one too.
Step-by-Step Homemade Rocky Road Ice Cream Recipe
Making Rocky Road ice cream from scratch is easier than you might think. Follow these simple steps to create a delicious treat everyone will love.
Step 1: Make the Ice Cream Base
In a large mixing bowl, whisk together the heavy cream, whole milk, sugar, vanilla extract, and cocoa powder until the sugar is completely dissolved. The cocoa powder adds a deep chocolate flavor that complements the sweetness of the ice cream. You’ll end up with a smooth, velvety chocolate base.
Step 2: Freeze the Ice Cream
If you have an ice cream maker, pour the mixture into the machine and churn according to the manufacturer’s instructions. If you don’t have an ice cream maker, don’t worry! Just pour the mixture into a shallow pan and place it in the freezer. Stir every 30 minutes with a fork for the first 3-4 hours to break up any ice crystals. This will give your ice cream a creamy texture.
Step 3: Add the Rocky Road Mix-ins
Once the ice cream base is firm and scoopable, gently fold in the mini marshmallows, roasted almonds (or other nuts), and chocolate chips. You want to make sure they are evenly distributed, but you don’t want to break the marshmallows into bits.
Step 4: Freeze and Serve
After adding the mix-ins, transfer the ice cream back to the freezer for 1-2 hours to harden further. When you’re ready to serve, simply scoop the creamy Rocky Road ice cream into bowls or cones. The chocolate ice cream combined with the crunchy almonds, gooey marshmallows, and rich chocolate bits is absolutely irresistible!
Pro Tips for Perfect Homemade Rocky Road Ice Cream
- Use Full-Fat Dairy: The key to creamy homemade ice cream is full-fat dairy products. Don’t skimp on the cream and whole milk—this will result in a rich, velvety texture.
- Customize Your Toppings: You can make Rocky Road your own by adding other mix-ins like pecans, walnuts, or even a swirl of caramel or fudge.
- Mix-In Timing: Add your mix-ins after the ice cream base has frozen a little but is still scoopable. This ensures they don’t sink to the bottom of the ice cream and stay well distributed.
- Chill the Base: If you have time, chill the ice cream base in the refrigerator for 1-2 hours before churning it. This helps the mixture churn faster and gives it a smoother texture.
How to Store Homemade Ice Cream
Store any leftover Rocky Road ice cream in an airtight container in the freezer for up to 1-2 weeks. You may want to cover the top of the ice cream with plastic wrap before sealing the container to prevent ice crystals from forming on the surface. If the ice cream becomes too hard, simply let it sit at room temperature for a few minutes to soften before serving.
Ways to Enjoy Rocky Road Ice Cream
This Rocky Road ice cream is perfect on its own, but here are a few other fun ways to serve it:
- Sundaes: Top with whipped cream, extra chocolate syrup, or even a cherry on top for a classic sundae.
- Ice Cream Sandwiches: Scoop the ice cream between two cookies for a delicious frozen treat.
- Milkshakes: Blend a scoop of ice cream with milk and a drizzle of chocolate syrup for a delicious milkshake.
- Cake Topper: Use this ice cream as a topping for chocolate cakes or brownies.
Frequently Asked Questions
Can I make this ice cream without an ice cream maker?
Yes! If you don’t have an ice cream maker, you can make it by hand. Just follow the instructions for the base and freeze the mixture, stirring it every 30 minutes for the first few hours to ensure a smooth consistency.
Can I make Rocky Road ice cream without cocoa powder?
Yes, you can skip the cocoa powder if you prefer a vanilla-based Rocky Road. Simply make a vanilla ice cream base instead and proceed with the mix-ins.
How long can I store homemade Rocky Road ice cream?
Homemade ice cream can last up to 1-2 weeks in the freezer. Make sure to store it in an airtight container to keep it fresh.
Final Thoughts
This homemade Rocky Road ice cream recipe is easy to make, incredibly satisfying, and a guaranteed crowd-pleaser. Whether you’re looking for a fun summer treat or a comforting dessert for a cozy evening, this ice cream will always hit the spot. Once you try this homemade version, you may never buy store-bought ice cream again. Enjoy every creamy, nutty, marshmallow-filled bite!