Easy Pickled Garlic Recipe
Tangy, Flavorful, and Perfect for Preserving Garlic
If you love the strong, savory flavor of garlic, this easy pickled garlic recipe is for you. Garlic is already a kitchen staple, but pickling it brings out a new level of flavor and makes it last much longer. The pickling process infuses garlic with tangy vinegar, savory spices, and a hint of heat, transforming it into a bold and versatile ingredient for your meals.
Pickled garlic is a fantastic addition to salads, sandwiches, pizzas, and pastas, or simply enjoyed on its own as a snack. It’s easy to make and requires minimal ingredients. Plus, it’s a great way to preserve fresh garlic when you have an abundance. Let’s walk through how to make this deliciously tangy pickled garlic at home.
Why Pickle Garlic at Home?
Pickling garlic at home offers several benefits. Not only does it help preserve garlic for longer periods, but it also enhances its flavor, making it more versatile. Homemade pickled garlic is:
Bold and tangy, with a unique flavor
Simple to make and uses common kitchen ingredients
Great for meal prep and storing excess garlic
A healthy, preservative-free snack
Perfect as a condiment or an ingredient for your favorite dishes
Pickling garlic is a great way to make use of extra garlic cloves and turn them into something that will elevate your meals all year round.
Ingredients for Easy Pickled Garlic
To make this simple and tangy pickled garlic, you’ll need the following ingredients:
1 pound garlic cloves, peeled
1 1/2 cups white vinegar
1/2 cup water
1 tablespoon salt
1 tablespoon sugar
1 teaspoon whole black peppercorns
1 teaspoon red pepper flakes (optional, for heat)
2 sprigs fresh dill (optional, for flavor)
This recipe is easy to prepare, with most ingredients being common pantry staples. The garlic cloves are the star, with the vinegar and spices adding the tangy and savory flavors.
Step by Step Easy Pickled Garlic Recipe
Follow these simple steps to make your own pickled garlic at home.
Step 1: Prepare the Garlic
Start by peeling the garlic cloves. You can do this by smashing the garlic with the flat side of a knife and then removing the skin. It’s okay if the garlic cloves aren’t perfectly peeled; any small bits of skin left behind will dissolve in the brine.
Step 2: Prepare the Pickling Liquid
In a small saucepan, combine the white vinegar, water, salt, and sugar. Bring the mixture to a simmer over medium heat, stirring occasionally until the salt and sugar have dissolved. Once the mixture comes to a simmer, remove it from the heat.
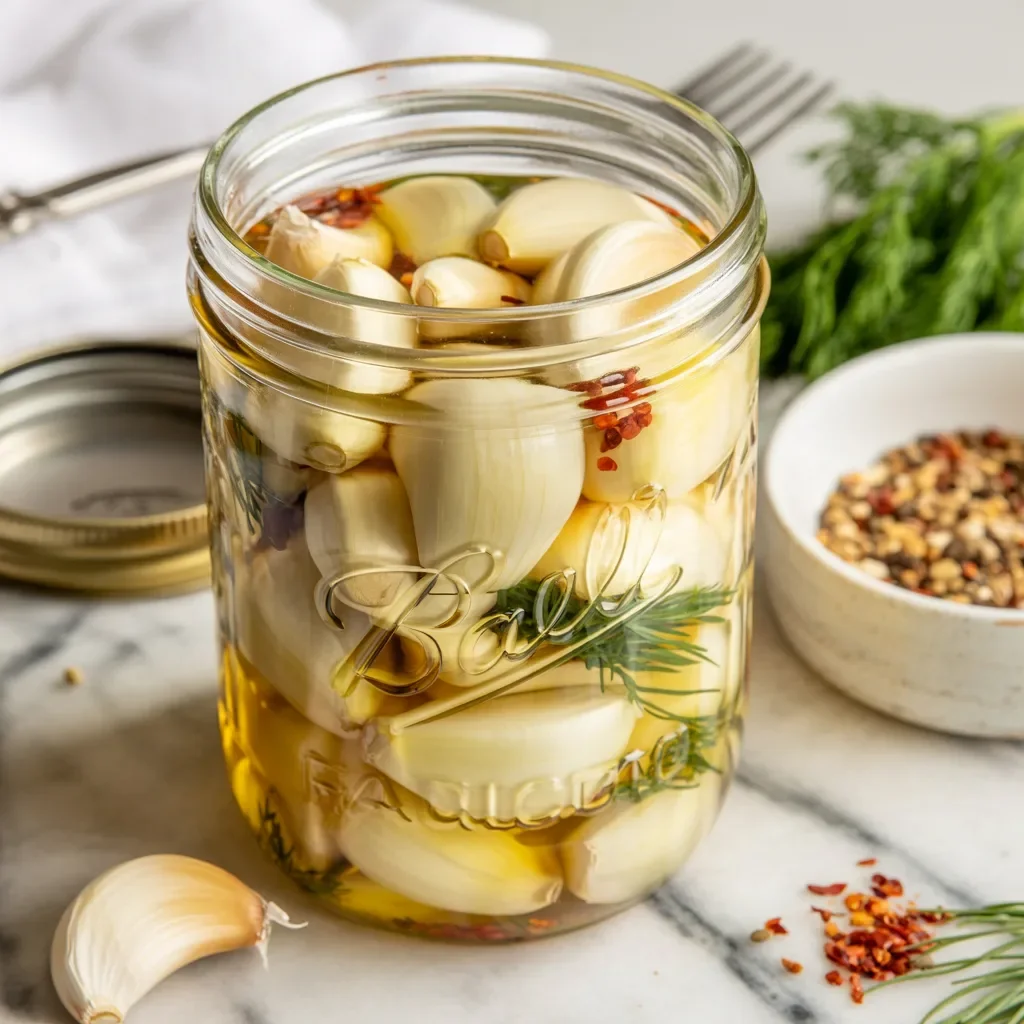
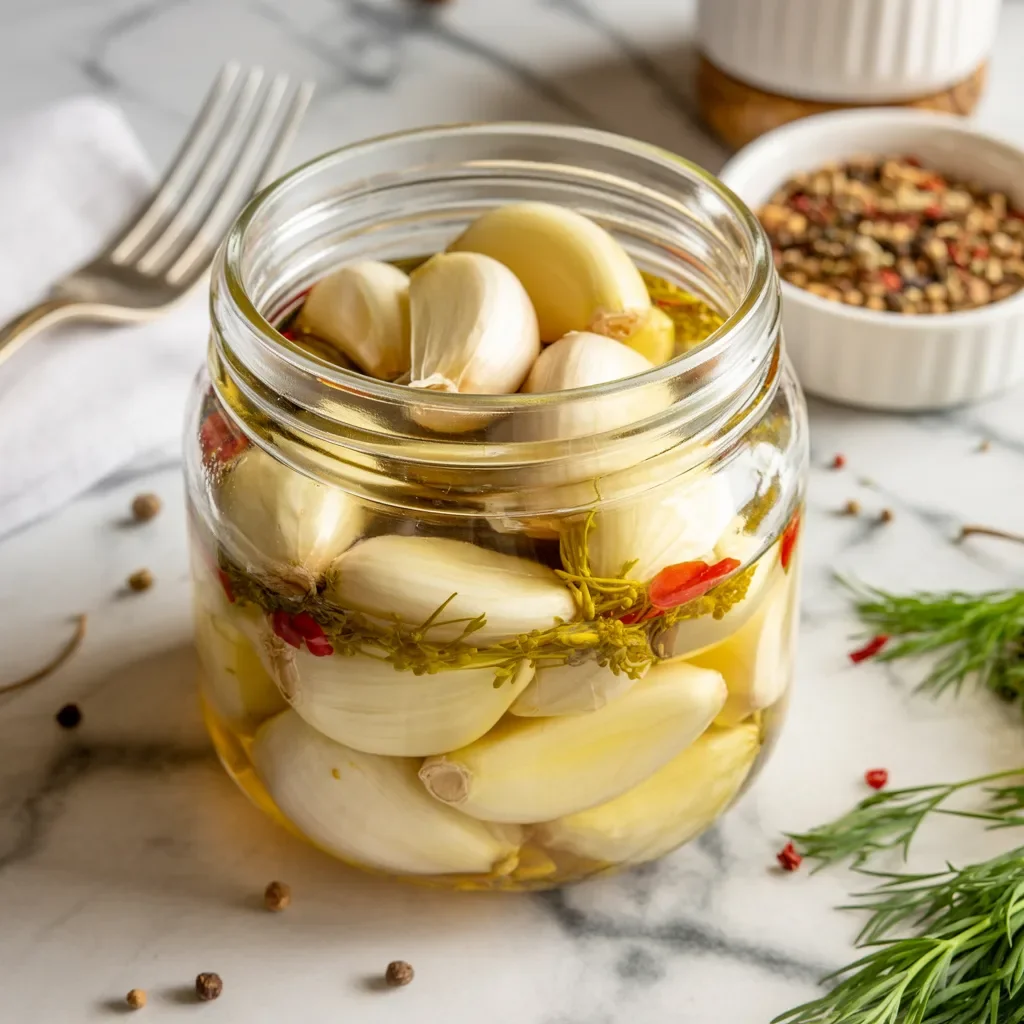
Step 3: Pack the Garlic into Jars
Pack the peeled garlic cloves into clean, sterilized mason jars, leaving about half an inch of space at the top. If you’re using dill and peppercorns, add them to the jar with the garlic.
Step 4: Pour the Pickling Liquid
Once the pickling liquid has cooled slightly, pour it over the garlic cloves in the jars. Ensure the garlic is fully submerged in the liquid. If necessary, you can press the garlic down with a clean utensil to release any air pockets.
Step 5: Seal and Store
Seal the jars with lids and allow them to cool to room temperature. Once cooled, store the jars in the refrigerator. Let the garlic pickle for at least 2 days before consuming, though it’s even better if left for 1-2 weeks to fully develop the flavors.
Step 6: Enjoy!
Your pickled garlic is ready to use! It will last in the refrigerator for up to 3 months. Use it to add flavor to your dishes, or enjoy it as a tangy snack.
Pro Tips for Perfect Pickled Garlic
These small tips will help you make the best pickled garlic:
Use fresh garlic for the best flavor.
For a milder taste, blanch the garlic cloves before pickling them.
Store the pickled garlic in the refrigerator to keep it fresh.
Add other spices like mustard seeds or bay leaves to experiment with flavors.
Let the garlic sit for at least 1 week for the best flavor.
How to Store Pickled Garlic
Pickled garlic should be stored in an airtight container in the refrigerator. It will stay fresh for up to 3 months. The longer it sits, the more flavorful it becomes, so don’t rush to finish it too quickly!
Ways to Use Pickled Garlic
Pickled garlic is a versatile ingredient that can be used in many ways:
Add it to your salads for a tangy crunch
Serve it alongside cheese and crackers as a snack
Top pizzas with pickled garlic for extra flavor
Use it in sandwiches or wraps for a savory bite
Add it to sauces, dips, or marinades for an extra zing
Once you start making pickled garlic, you’ll find new ways to incorporate it into your meals.
Frequently Asked Questions
How long does pickled garlic last?
Pickled garlic can last up to 3 months when stored properly in the refrigerator.
Can I make it without vinegar?
No, vinegar is essential to the pickling process. It helps preserve the garlic and gives it that tangy flavor.
Can I use other types of vinegar?
Yes! You can experiment with other vinegars like apple cider vinegar or white wine vinegar for a different flavor profile.
Final Thoughts
This easy pickled garlic recipe is a simple and flavorful way to preserve garlic while giving it an extra burst of tangy goodness. The garlic cloves become tender and full of flavor, making them perfect for a variety of dishes. With just a few ingredients and some patience, you can create your own homemade pickled garlic that will last for months. So, grab your garlic, get pickling, and enjoy the bold, tangy flavors of this versatile treat!