No Bake Chocolate Peanut Butter Desserts: Rich, Decadent, and Better Than the Bakery
If you are looking for the ultimate indulgent treat that does not require turning on the oven, these no bake chocolate peanut butter desserts are exactly what you need. This recipe combines the classic, irresistible pairing of a fluffy, creamy peanut butter filling with a rich, silky chocolate ganache, all resting on a buttery graham cracker crust. Made with just a few simple pantry staples, it is a delicious, crowd-pleasing, and easy-to-make alternative to complicated baked cakes or pies. If you are looking for a quick, foolproof dessert that takes minimal active effort, let’s get right into it!
Why You Will Love This Recipe
If you’ve been stuck in a rut of just making basic brownies or standard cookies, you are going to fall in love with this method. This layered dessert is:
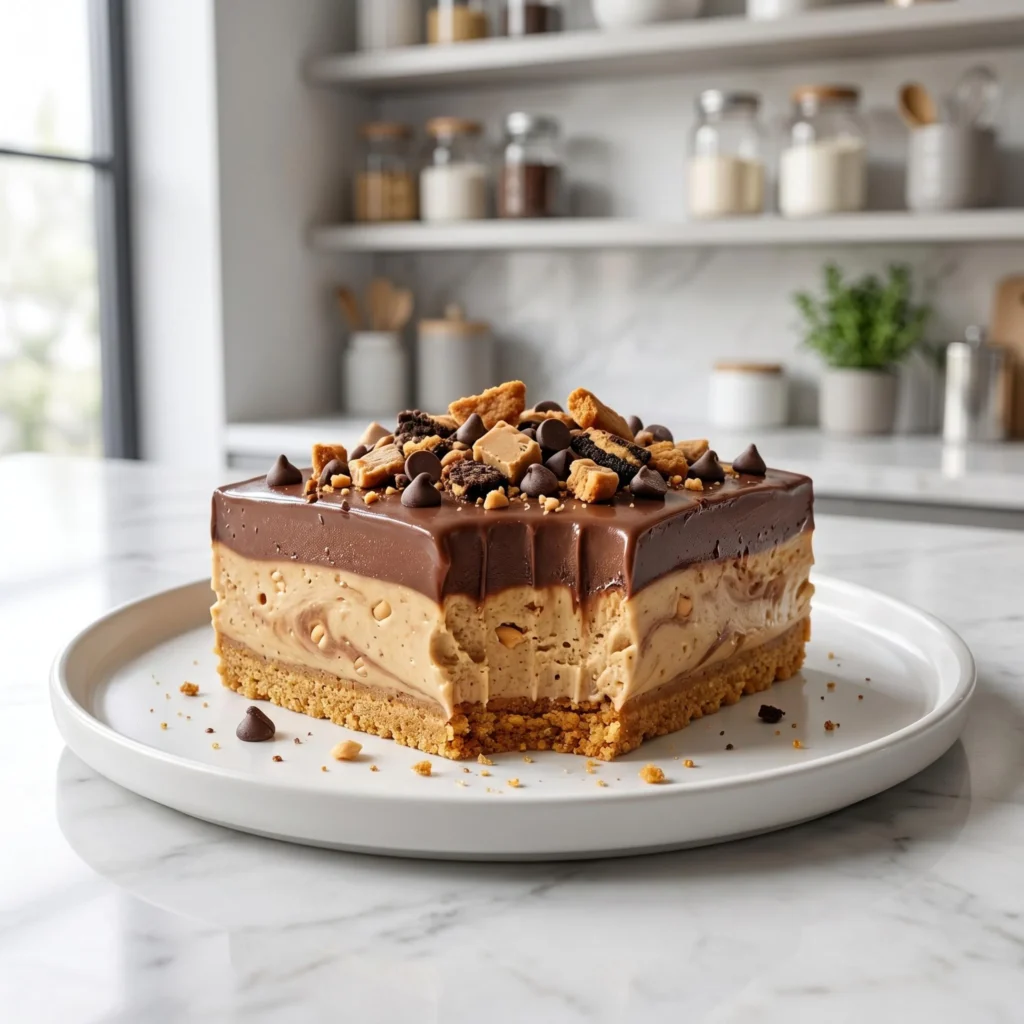
Texturally perfect: A crunchy graham cracker base provides the perfect foundation for the incredibly light, airy peanut butter mousse and the dense, silky chocolate topping.
Highly customizable: You can easily swap the graham crackers for an Oreo cookie crust, or load the top with crushed pretzels for a salty-sweet crunch.
Made with basic staples: You only need peanut butter, cream cheese, powdered sugar, chocolate chips, heavy cream, and butter.
Visually gorgeous: The distinct, contrasting layers of tan peanut butter and dark chocolate look stunning when sliced and served on a white plate.
Ingredients You Will Need
The beauty of this recipe lies in its sheer simplicity. To get that perfect rich and creamy bite, you will need:
For the Crust:
- 1 ½ cups graham cracker crumbs
- 6 tablespoons unsalted butter (melted)
For the Peanut Butter Layer:
- 1 block (8 oz) cream cheese (softened)
- 1 cup creamy peanut butter (standard, not natural)
- 1 cup powdered sugar
- 1 tub (8 oz) whipped topping (thawed)
For the Chocolate Ganache:
- 1 cup semi-sweet chocolate chips
- ½ cup heavy whipping cream
- Crushed cookies, mini chocolate chips, and peanut butter chips for garnish
Step-by-Step Instructions for No Bake Chocolate Peanut Butter Desserts
Follow these easy steps. I’ve broken them down into quick, bite-sized pieces so you can achieve maximum decadence without any stress!
Step 1: Prep the Crust Mix the graham cracker crumbs and melted butter. Press the mixture firmly into an 8×8 inch square dish. Place the dish in the freezer to set.
Step 2: Beat the Filling Put the softened cream cheese in a large bowl. Beat until completely smooth and creamy. Add the peanut butter and powdered sugar. Beat until fully combined and thick.
Step 3: Fold in the Fluff Add the thawed whipped topping to the bowl. Use a rubber spatula to gently fold it in. Spread this fluffy mixture evenly over the chilled crust. Put the dish back in the fridge.
Step 4: Make the Ganache Heat the heavy cream in the microwave until hot. Pour the hot cream over the chocolate chips. Let it sit undisturbed for 3 minutes. Whisk gently until it becomes a smooth, glossy chocolate sauce.
Step 5: Chill and Garnish Pour the ganache over the peanut butter layer. Spread it to the edges. Immediately top with crushed cookies and chocolate chips. Chill in the fridge for at least 4 hours before slicing!
Pro Tips for the Ultimate Dessert
Small adjustments can take your layered dessert from good to absolute perfection.
Avoid natural peanut butter: For the best texture, use a standard processed creamy peanut butter (like Jif or Skippy). Natural peanut butters separate and can make your filling oily and grainy.
Soften the cream cheese: Attempting to beat cold cream cheese will leave you with unappetizing white lumps in your peanut butter layer. Let it sit on the counter for at least an hour before starting.
Use a hot knife: For those perfect, bakery-style clean slices, run a sharp chef’s knife under hot water and wipe it dry before making each cut through the chilled dessert.
What to Serve with No Bake Chocolate Peanut Butter Desserts
This incredibly rich dessert pairs beautifully with simple, classic additions.
As an after-dinner treat: Serve a generous square alongside a cold glass of whole milk or a hot, robust cup of dark roast coffee to balance the sweetness.
At a potluck: Cut the dessert into smaller, bite-sized squares and arrange them on a platter for an easy, grab-and-go party snack.
Loaded style: Serve a slice in a bowl topped with a scoop of vanilla bean ice cream and an extra drizzle of warm hot fudge sauce!
How to Store No Bake Chocolate Peanut Butter Desserts
Have leftovers? It is incredibly easy to save them for later!
In the Fridge: Store the completely chilled dessert in an airtight container or cover the dish tightly with plastic wrap in the refrigerator for up to 5 days.
How to Serve: Always serve this dessert straight from the fridge! If it sits out at room temperature for too long, the peanut butter mousse will soften and lose its beautiful, firm structure.
In the Freezer: You can easily freeze these layered squares! Wrap individual slices tightly in plastic wrap and store them in a freezer bag for up to 3 months. Enjoy them partially frozen for an ice cream cake-like texture, or thaw in the fridge overnight.
Frequently Asked Questions
Can I use a pre-made crust? Absolutely! To save even more time, you can spread the filling into a store-bought graham cracker or chocolate cookie pie crust.
Can I use whipped cream instead of whipped topping? Yes! You can whip 1 cup of heavy whipping cream to stiff peaks and gently fold it into the peanut butter mixture in place of the store-bought tub of whipped topping.
Can I prep this ahead of time? Yes! This is the perfect make-ahead dessert. You can prepare the entire dish and keep it covered in the fridge for up to 2 days before serving.
Final Thoughts
This no bake chocolate peanut butter desserts recipe is proof that making a show-stopping sweet treat doesn’t have to be complicated. With a quick crust, a fluffy center, and a rich chocolate top, you get the ultimate decadent bite every single time. Try it today, and I promise it’ll become a permanent favorite at your table!