The Best Easy Fruit Pizza Recipe: Bright, Beautiful, and the Ultimate Summer Dessert
There is something incredibly joyful about slicing into a dessert that looks like a vibrant work of art. A classic fruit pizza—featuring a soft, buttery sugar cookie crust, a rich cream cheese frosting, and a rainbow of fresh, juicy fruit—is the ultimate crowd-pleasing treat. Once you try this easy fruit pizza recipe at home, it will quickly become your go-to dessert for every warm-weather gathering.
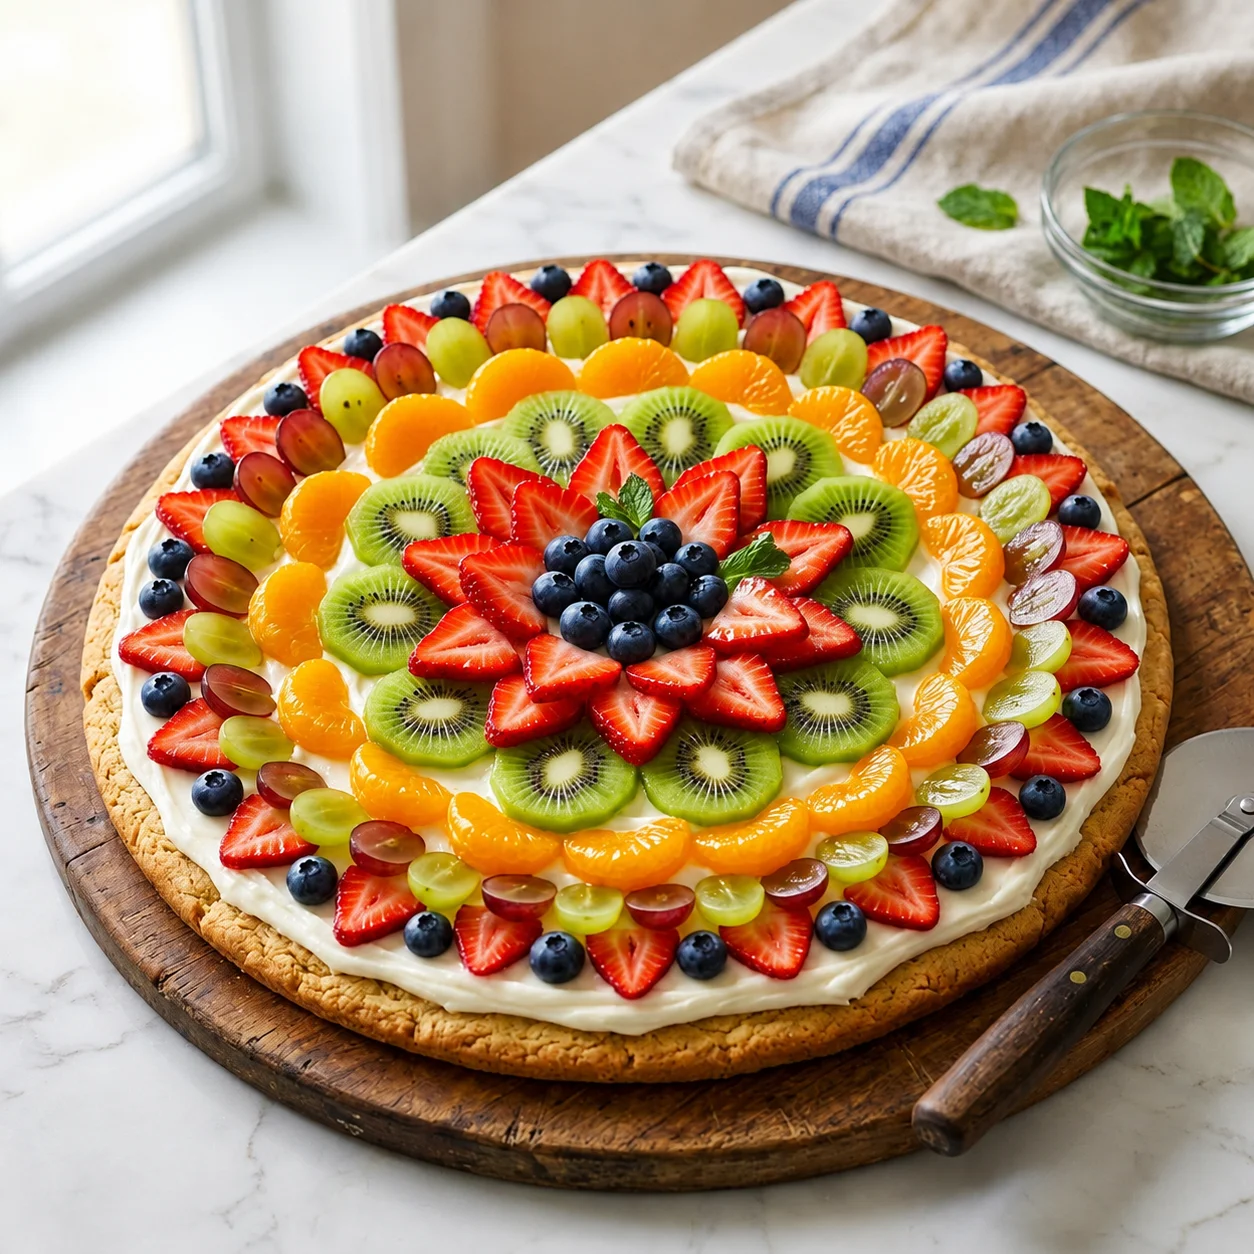
Whether you are hosting a backyard barbecue, celebrating a milestone, or styling a visually stunning, highly textured centerpiece for your culinary feed, this dessert is a guaranteed showstopper. The geometric rings of bright red strawberries, deep blue berries, and vibrant green kiwis look absolutely breathtaking displayed on a rustic wooden pizza board. The best part? You only need a few simple ingredients and minimal baking time to bring this masterpiece to life. Let’s walk through everything step-by-step so you can master this photogenic, delicious fruit pizza perfectly on your first try.
Why Make Fruit Pizza at Home?

If you have only ever bought pre-made fruit tarts from the bakery, you are missing out on how simple and rewarding it is to craft your own. A homemade fruit pizza is:
- Incredibly fresh: You choose the ripest, most flavorful seasonal fruits.
- Perfectly balanced: The tangy cream cheese cuts through the sweetness of the sugar cookie base.
- Highly customizable: You can design any pattern and use any fruit combination you love.
- Aesthetically stunning: The brilliant, natural colors create a camera-ready dessert that looks like it took hours to assemble.
- Budget-friendly: Feeding a crowd with a massive homemade fruit pizza costs a fraction of a bakery order.
The flavor and texture combination is undeniable. The soft, chewy bite of the cookie perfectly complements the smooth frosting and the crisp, refreshing snap of fresh fruit.
Ingredients for Easy Fruit Pizza
One of the reasons this recipe works so flawlessly is its elegant simplicity. You’ll need three simple components:
For the Sugar Cookie Crust:
- 1/2 cup (1 stick) unsalted butter, softened
- 3/4 cup granulated sugar
- 1 large egg
- 1 teaspoon pure vanilla extract
- 1 1/2 cups all-purpose flour
- 1 teaspoon baking powder
- 1/4 teaspoon salt (Pro Tip: If you are critically short on time, you can substitute the homemade dough with one 16.5-ounce roll of refrigerated store-bought sugar cookie dough!)
For the Cream Cheese Frosting:
- 8 ounces full-fat cream cheese, softened to room temperature
- 1/4 cup (1/2 stick) unsalted butter, softened
- 1 1/4 cups powdered sugar
- 1 teaspoon pure vanilla extract
For the Fruit Topping & Glaze:
- 3 to 4 cups of fresh fruit: sliced strawberries, kiwi, mandarin oranges, blueberries, and halved grapes.
- 2 tablespoons apricot preserves or jam mixed with 1 teaspoon warm water (for a professional, glossy shine).
Step-by-Step Easy Fruit Pizza Recipe
Follow these simple steps for a perfectly baked crust and a beautiful presentation.
Step 1: Mix the Cookie Dough Preheat your oven to 350°F. In a large mixing bowl, beat the softened butter and granulated sugar until light and fluffy. Add the egg and vanilla, mixing until combined. Gradually add the flour, baking powder, and salt. Mix just until a soft dough forms.
Step 2: Bake the Crust Line a 12-inch round pizza pan or a large baking sheet with parchment paper. Transfer the dough to the center of the pan. Using your hands lightly dusted with flour, press the dough out into a large, even circle about 1/4-inch thick. Bake for 12 to 15 minutes, or until the edges are just turning golden brown. Let the crust cool completely on the pan.
Step 3: Whip the Frosting While the crust cools, make the frosting. In a medium bowl, beat the softened cream cheese and butter together until completely smooth and free of lumps. Add the powdered sugar and vanilla extract, beating until the mixture is light, creamy, and spreadable.
Step 4: Prep the Fruit Wash and thoroughly dry all your fruit. This is a crucial step! Use paper towels to pat the strawberries and washed berries completely dry. Slicing the fruit into uniform sizes will make your final design look incredibly neat and professional.
Step 5: Assemble and Arrange Once the cookie crust is 100% cool to the touch, spread the cream cheese frosting evenly over the top, leaving a small border around the edge for the “crust.” Now, arrange your fruit. For a classic, striking look, start from the outside edge and work your way in, creating concentric overlapping circles of different fruits and colors until you reach the center.
Step 6: Glaze and Chill For that ultimate, bakery-style finish that catches the light perfectly on camera, brush the arranged fruit lightly with the thinned apricot jam. Chill the fruit pizza in the refrigerator for at least 1 hour before slicing to allow the frosting to set.
Pro Tips for Perfect Fruit Pizza
Small details elevate this simple dessert into a culinary masterpiece.
- Never frost a warm crust: If the cookie base has even a hint of warmth left, the cream cheese frosting will melt, slide off the edges, and turn into a messy puddle.
- Dry your fruit: Excess water from washed berries will bleed into the white frosting and make the cookie base soggy. Pat everything aggressively dry.
- Avoid fruits that brown quickly: Bananas and apples will oxidize and turn brown shortly after slicing. Stick to berries, citrus, kiwi, and grapes for a vibrant look that lasts.
How to Store Homemade Fruit Pizza
Because of the fresh fruit and dairy-based frosting, this dessert must be kept cold.
Store any leftover fruit pizza in the refrigerator, lightly covered with plastic wrap or in an airtight container, for up to 3 days. The cookie crust will naturally soften a bit each day as it absorbs moisture from the frosting and fruit, but it will remain absolutely delicious.
Do not freeze a fully assembled fruit pizza, as the fresh fruit will turn to mush when thawed. However, you can bake the cookie crust up to a month in advance and freeze it tightly wrapped until you are ready to frost and decorate.
Ways to Customize Your Fruit Pizza
This dessert is a completely blank canvas for your creativity. Try these fun variations:
- The Berry Patch: Use exclusively red, blue, and black berries for a dramatic, deeply colored summer tart.
- Tropical Vibes: Top with mango slices, pineapple chunks, kiwi, and a sprinkle of toasted coconut flakes.
- Patriotic Pizza: Use only strawberries, raspberries, and blueberries arranged in a flag or star pattern for summer holidays.
- Mini Pizzas: Instead of one large crust, bake the dough as individual, standard-sized cookies and let your guests frost and decorate their own!
Frequently Asked Questions
Why did my cookie crust get hard? Overbaking is the usual culprit. Sugar cookie dough continues to bake slightly on the hot pan after you remove it from the oven. Pull it out as soon as the edges show a hint of golden brown, even if the center looks slightly soft.
Can I make this ahead of time? You can bake the crust and make the frosting up to 2 days in advance, keeping the frosting in the fridge and the crust wrapped at room temperature. However, for the crispest crust and freshest looking fruit, it is best to assemble the pizza no more than 4 to 6 hours before serving.
What can I substitute for cream cheese? If you aren’t a fan of cream cheese, you can frost the base with a thick layer of vanilla pudding, mascarpone cheese whipped with a little honey, or even a stabilized whipped cream.
Final Thoughts
This easy fruit pizza recipe proves that creating a breathtaking, gourmet dessert doesn’t require complex pastry techniques or hours of stress in the kitchen. With a simple, buttery cookie base, a tangy frosting, and the natural beauty of fresh produce, you can create a vibrant centerpiece that completely steals the show.
Once you slice into that chilled, colorful pizza, getting a perfect bite of chewy cookie, rich cream, and bright fruit, you will understand why this recipe is a timeless classic. So preheat your oven, slice up your favorite fruits, and enjoy the simple thrill of creating a beautiful, edible work of art!