The Best Fried Pickles Recipe: Crispy, Tangy, and Perfectly Golden
There’s something incredibly addictive about a perfectly fried pickle. The contrast between the hot, salty, ultra-crispy breading and the cool, tangy snap of the dill pickle inside is a flavor combination that hits every single time. Once you try this easy, flawlessly textured fried pickles recipe at home, you will never settle for the soggy, heavily battered versions from the local pub again.
Whether you are hosting a game day watch party, putting together a fun weekend appetizer, or styling a mouthwatering, highly textured spread for your latest food blog post, this recipe is a guaranteed standout. The golden-brown crust, speckled with savory spices and brightened by fresh herb garnishes, looks absolutely stunning on camera and tastes even better. The best part? You only need a few simple pantry staples and about 20 minutes to pull it off. Let’s walk through everything step-by-step so you can master these crave-worthy, crispy pickle chips perfectly on your first try.
Why Make Fried Pickles at Home?

If you’ve only ever ordered fried pickles at a restaurant, you might be used to breading that slides right off or pickles that have turned to mush. Homemade fried pickles change the game entirely. They are:
- Unbelievably crispy: By frying them fresh and serving immediately, you get maximum crunch.
- Perfectly balanced: You control the salt and spice levels in the breading.
- Made with your favorite pickles: Choose your preferred brand and thickness for the perfect bite.
- Aesthetically stunning: The golden crust, dusted with flaky salt and fresh parsley, creates a visually inviting, restaurant-quality presentation.
- Budget-friendly: A single jar of pickles yields a massive batch of this crowd-pleasing appetizer.
The secret to the best fried pickles lies in managing moisture. By taking a few extra seconds to prep your ingredients properly, you ensure a shatteringly crisp crust every single time.
Ingredients for the Best Fried Pickles
The key to a light, crispy coating that actually sticks to the pickle is using the right blend of dry ingredients. You’ll need:
- 1 jar (16 oz) dill pickle chips: Crinkle-cut or smooth, just ensure they are thick enough to maintain their snap.
- 1/2 cup buttermilk: Helps the breading adhere and adds a slight tang.
- 1 cup all-purpose flour: The base of our breading.
- 1/4 cup cornstarch: The absolute secret ingredient for a delicate, shatteringly crisp crust.
- 1 teaspoon paprika: For a beautiful golden color.
- 1 teaspoon garlic powder & 1 teaspoon onion powder: For savory depth.
- 1/2 teaspoon cayenne pepper: Optional, for a subtle background heat.
- Salt and freshly cracked black pepper: To taste.
- Neutral frying oil: Canola, vegetable, or peanut oil work best.
- Garnishes: Freshly chopped parsley or dill, and coarse sea salt.
Step-by-Step Fried Pickles Recipe
Follow these simple steps for perfectly golden, tangy, and crispy pickle chips.
Step 1: Dry the Pickles (The Most Important Step!) Remove the pickle chips from the jar and lay them flat on a baking sheet lined with several layers of paper towels. Thoroughly pat the tops dry with more paper towels. If the pickles are wet, the breading will steam and slide right off. You want them as dry as possible.
Step 2: Prepare the Breading Station Set up two shallow bowls. In the first bowl, pour the buttermilk. In the second bowl, whisk together the flour, cornstarch, paprika, garlic powder, onion powder, cayenne, salt, and black pepper. Stir until the spices are evenly distributed.
Step 3: Bread the Pickles Working in small batches, toss the dried pickles into the seasoned flour mixture first to give them a dry base layer. Shake off the excess, dip them quickly into the buttermilk, and then immediately back into the flour mixture. Press the flour into the ridges of the pickles so they are completely coated. Transfer the breaded pickles to a dry wire rack.
Step 4: Heat the Oil Pour about 1.5 to 2 inches of neutral oil into a heavy-bottomed pot or deep skillet (like cast iron). Heat the oil over medium-high heat until it reaches 375°F (190°C). Pro Tip: Drop a tiny pinch of flour into the oil; if it immediately sizzles and dances, you are ready to fry.
Step 5: Fry to Golden Perfection Carefully drop the breaded pickles into the hot oil one by one. Do not overcrowd the pan; fry them in batches of 8 to 10. Fry for about 2 to 3 minutes, flipping gently halfway through, until the crust is a deep, gorgeous golden brown.
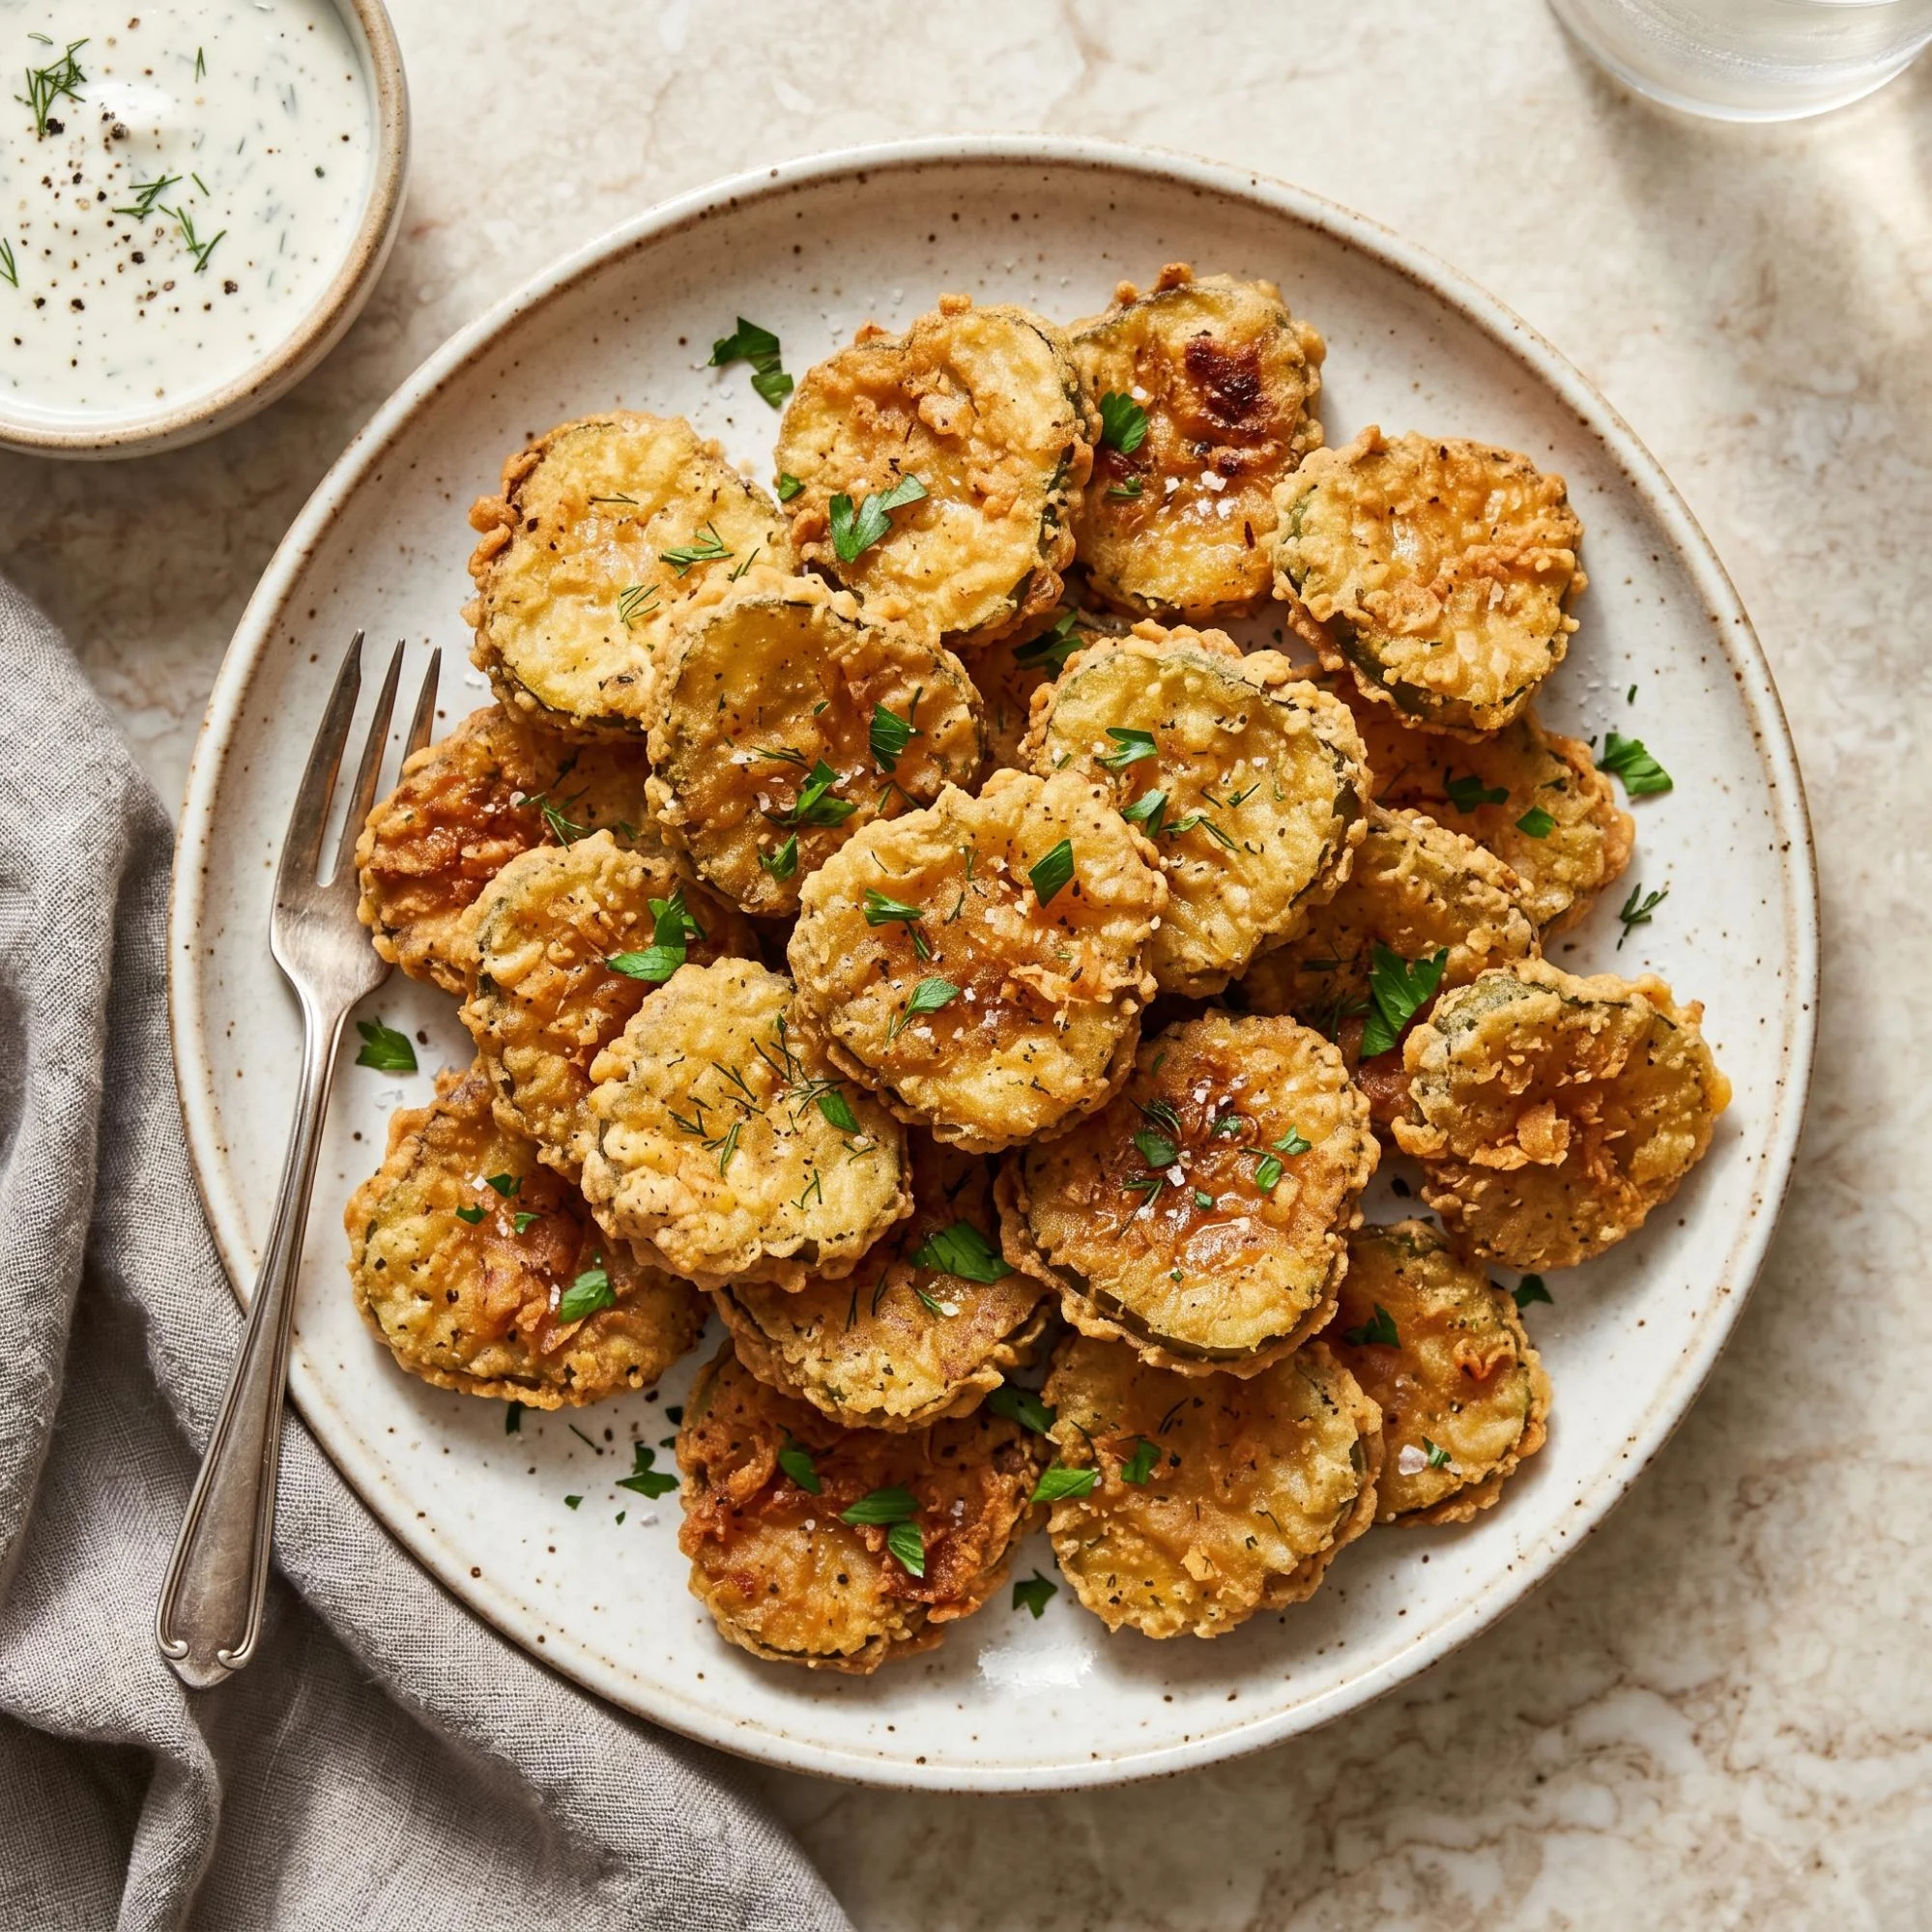
Step 6: Drain, Garnish, and Serve Remove the pickles using a slotted spoon or spider strainer and transfer them to a wire cooling rack set over a baking sheet. (Avoid draining on paper towels, which will trap steam and ruin the crispness). Immediately sprinkle with coarse sea salt and freshly chopped parsley or dill while the crust is still hot and glistening.
Pro Tips for Ultimate Crunch and Presentation
Small details turn a good appetizer into an extraordinary one, especially when you are eating with your eyes first.
- Use crinkle-cut pickles: The ridges provide extra surface area for the breading to hold onto, resulting in a thicker, crunchier crust that catches the light beautifully.
- Keep your oil hot: If the oil temperature drops too low between batches, the breading will absorb the oil and become greasy. Let the oil come back to 375°F before adding the next batch.
- Style it right: For a stunning visual presentation, serve the hot fried pickles piled high on a light, speckled ceramic plate. Pair it with a rustic linen napkin and a small, coordinating bowl of creamy dip to make the golden colors pop.
The Perfect Dipping Sauces
No plate of fried pickles is complete without a rich, creamy sauce to cool down the salty, crispy bite. Serve yours alongside:
- Homemade Buttermilk Ranch: Packed with fresh dill, chives, and plenty of black pepper.
- Spicy Sriracha Mayo: A simple blend of mayonnaise, a squeeze of lemon, and hot sauce for a fiery kick.
- Cajun Remoulade: A zesty, horseradish-forward sauce that perfectly complements the tang of the pickle.
Frequently Asked Questions
Why did my bread fall off in the oil? The pickles were likely too wet when you breaded them, or you skipped the initial dusting of flour before the buttermilk. Always pat them aggressively dry, and let the breaded pickles rest on a wire rack for 2-3 minutes before frying so the coating can hydrate and stick.
Can I make these in an air fryer? Yes! While deep frying gives the ultimate restaurant-quality crunch, you can air fry them for a lighter option. Spray the breaded pickles generously with cooking oil spray and air fry at 400°F (200°C) for 8 to 10 minutes, flipping halfway, until golden and crisp.
Can I use pickle spears instead of chips? Absolutely. The process is exactly the same, but spears will take slightly longer to fry (about 4 to 5 minutes) and are perfect for dipping.
Final Thoughts
This easy fried pickles recipe proves that creating a restaurant-quality, wildly popular appetizer in your own kitchen is entirely achievable. With a few simple tricks for managing moisture and the magic of a cornstarch-laced breading, you can produce a mountain of beautifully golden, tangy, and shatteringly crisp pickle chips.
Once you pull that first golden batch out of the hot oil, generously garnished with fresh herbs and paired with a creamy dill dip, you’ll understand why making these from scratch is so rewarding. Heat up that oil, dry off those pickles, and enjoy the simple thrill of creating the ultimate crispy snack!