15 Thanksgiving Cookies Decorated Ideas: Cute, Cozy & Creative Holiday Treats
Pies get most of the attention on Thanksgiving, but the small treats are the ones people photograph. A tray of decorated cookies makes the dessert table look like you planned it for weeks, even if you baked them over one weekend.
The good news is that you do not need fancy skills. Some of these cookies use only icing and a steady hand. Others are just candy pressed onto a store bought cookie. This list of 15 Thanksgiving cookies decorated ideas covers both, with easy acorn bites and hand painted leaves side by side.
Each idea comes with a short supply list, simple steps, and a tip to avoid common mistakes. You will also find a basic sugar cookie recipe, an icing guide, and a 3 day plan, so the baking never feels rushed.
Pick one or two to start, and build the rest of your cookie tray from there.
PICK YOUR COOKIE BY SKILL LEVEL
Not sure which idea to try first? Use these cards to match a cookie to your time and skill.
#7 Cookie Box Mix
#12 Pumpkin Spice Frosted
#15 Spiced Cookie Bites
#3 Pumpkin Pie Slices
#5 Pumpkin Swirl
#9 Festive Plaid
#10 Apple Harvest
#11 Mini Cookie Tray
#4 Cornucopia
#8 Thank You Cookies
#13 Painted Wreaths
#14 Woodland Friends
WHAT YOU NEED BEFORE YOU START
A few basic tools make every idea on this list easier. You do not need all of them, but these save the most time.
Tools
- Cookie cutters in leaf, pumpkin, turkey, apple, round, and square shapes
- Piping bags and small round tips, sizes 2 and 3
- Toothpicks, to pop air bubbles and move icing
- A small, clean paintbrush for the watercolor and wreath cookies
- Parchment paper and a cooling rack
Colors
- Gel food coloring in orange, red, yellow, brown, green, and black
- Black and white are the colors you will use most
Tip: Buy gel color, not liquid. Liquid color thins your icing and makes pale, runny shades.
BASIC SUGAR COOKIE AND ROYAL ICING
Most of the decorated cookies below start with the same two recipes. Make them once, and you can use them for ideas 1 to 5, 8 to 11, 13, and 14.
Cut Out Sugar Cookie Ingredients (makes about 24 medium cookies)
- 1 cup butter, softened
- 1 cup sugar
- 1 large egg
- 2 teaspoons vanilla extract
- 3 cups all purpose flour
- 1 teaspoon baking powder
- ½ teaspoon salt
How to make the cookies
- Beat the butter and sugar until creamy. Mix in the egg and vanilla.
- Stir in the flour, baking powder, and salt until a soft dough forms.
- Roll the dough ¼ inch thick between two sheets of parchment. Cut your shapes.
- Chill the cut shapes on a tray for 10 minutes so they keep their edges.
- Bake at 350°F for 8 to 10 minutes, until the edges are barely golden. Cool fully before icing.
Royal Icing Ingredients
- 4 cups powdered sugar
- 3 tablespoons meringue powder
- 5 to 6 tablespoons warm water
- 1 teaspoon vanilla extract
How to make the icing
- Beat everything on low, then medium, for 5 minutes until stiff and glossy.
- Split it into bowls and color each one.
- Thin each bowl with water, a few drops at a time, to the thickness you need (see the guide below).
- Keep the bowls covered with a damp cloth so the icing does not dry out.
1. Fall Watercolor Leaf Cookies
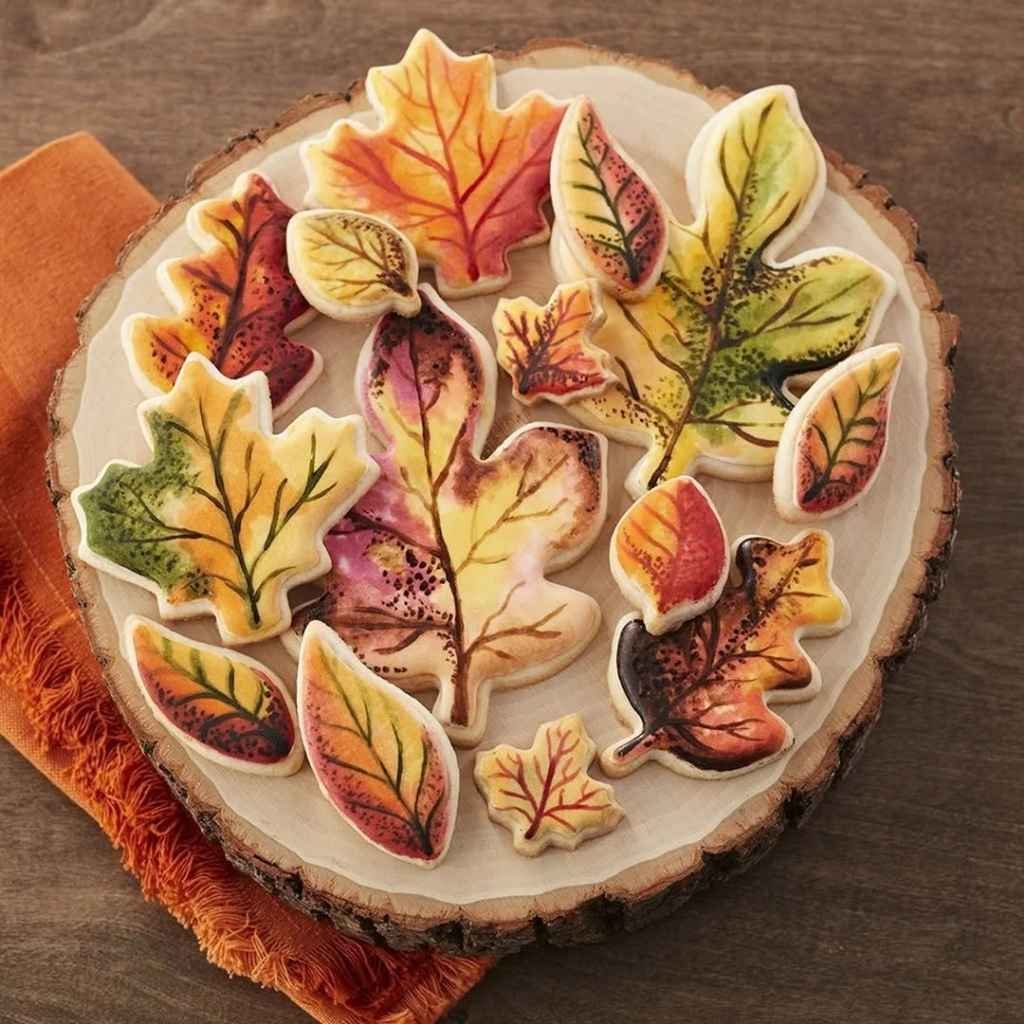
These cookies look like tiny paintings. A leaf shaped cookie gets a white base, then soft strokes of gold, orange, red, and green on top. They sit well on a wooden board or at each place setting.
Supplies
- Baked leaf cut out cookies
- White flood icing
- Gel color in gold, orange, red, and green
- A few drops of clear extract, such as lemon or vanilla, to thin the color
- A small, clean paintbrush
How to Decorate
- Flood each cookie with white icing and let it dry for 6 to 8 hours, until hard.
- Mix a tiny dab of gel color with a few drops of clear extract on a plate.
- Brush a light wash of gold across the leaf, then blend in orange and red while it is still damp.
- Add thin green or brown lines for the veins, and flick the brush for tiny speckles.
- Let the paint dry for 1 hour.
Tip: Practice on a piece of parchment first. Use more extract and less color for a soft, watery look.
2. Chocolate Turkey Cookies
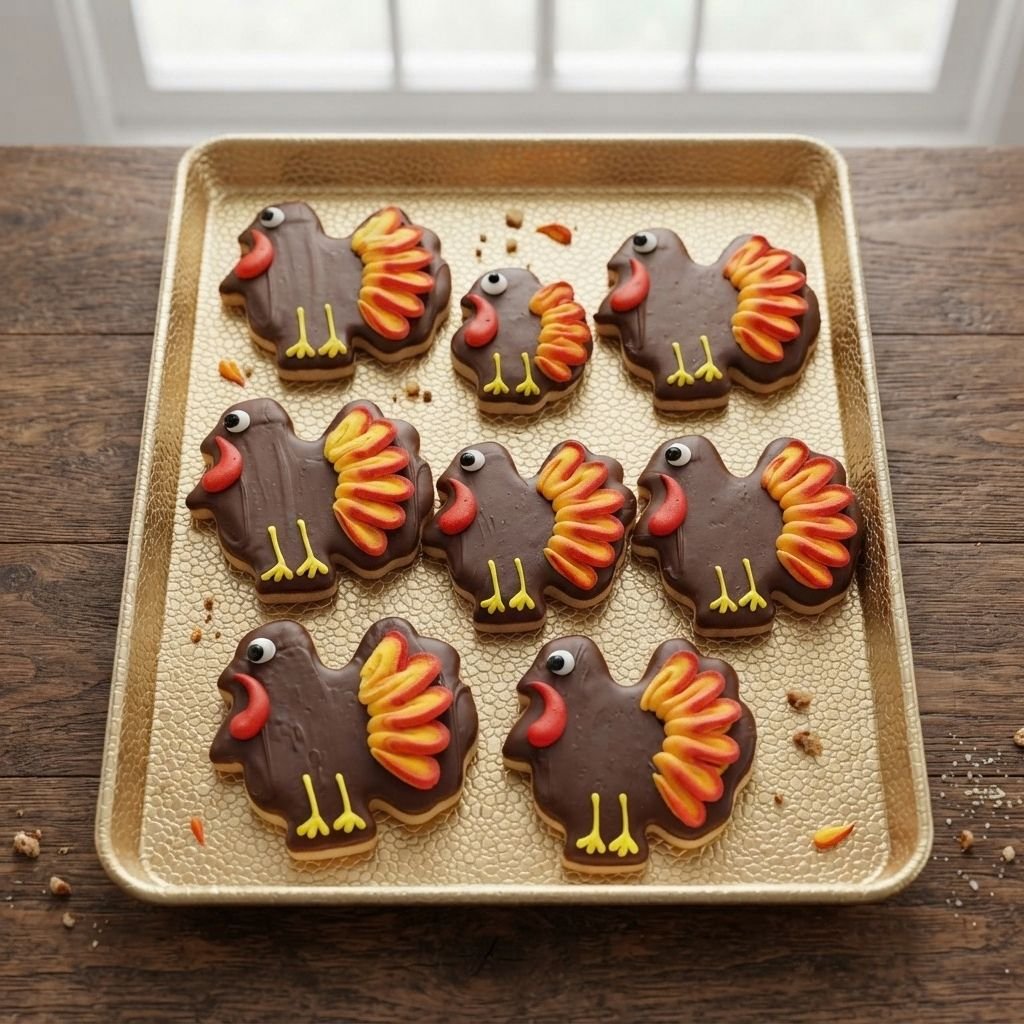
These turkeys have a chocolate body and bright, colorful feathers. They look playful and kids love to help add the eyes.
What You Need
- Baked turkey cut out cookies
- Melted chocolate or chocolate icing for the body
- Royal icing in orange, yellow, and red for the feathers
- Candy eyes and a small bit of red icing for the wattle
Steps
- Coat the body of each turkey with chocolate and let it set.
- Pipe rows of feathers around the top edge in red, orange, and yellow.
- Press on the candy eyes with a dot of icing.
- Add a small orange beak and a red wattle.
- Let the icing dry for 1 to 2 hours before stacking.
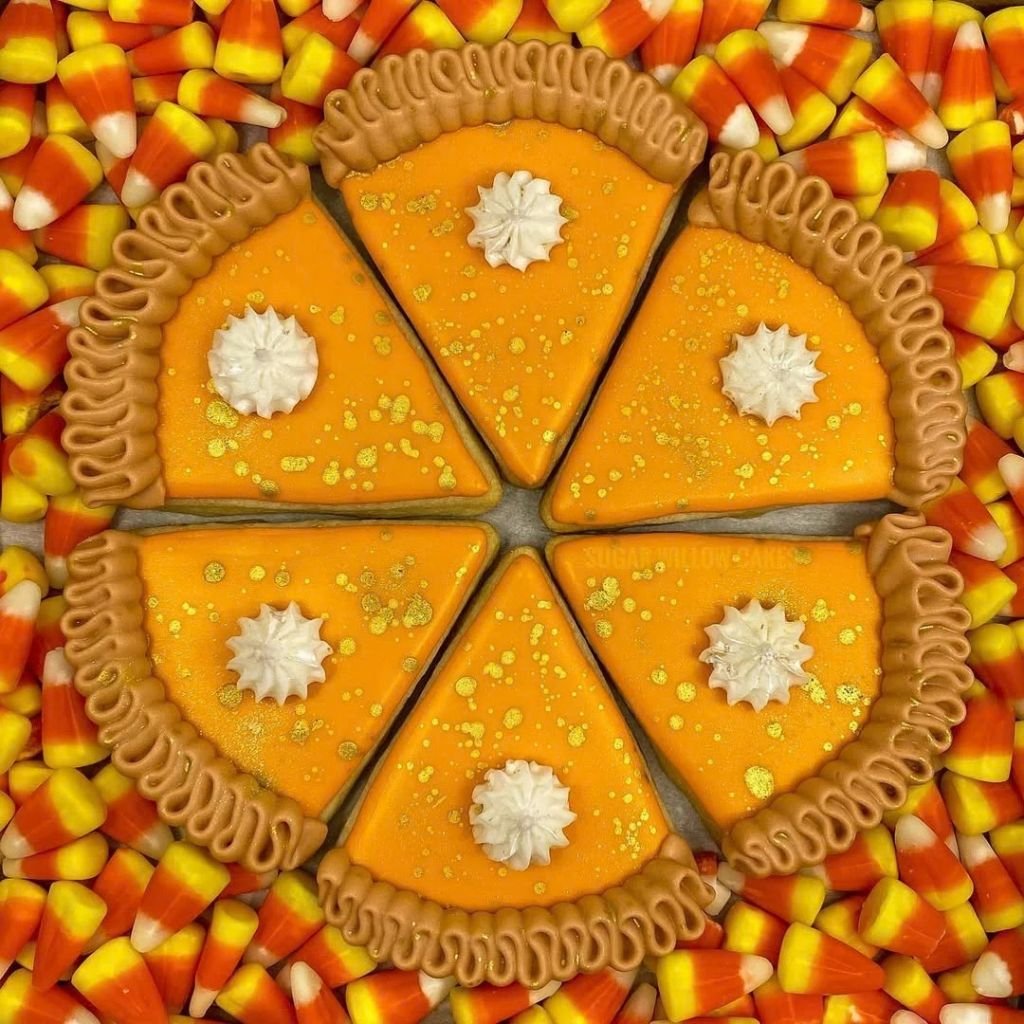
3. Pumpkin Pie Slice Cookies
These cookies look like a real pumpkin pie, cut into wedges. Orange icing, a brown crust, and a dot of “whipped cream” do all the work.
Gather These
- Baked wedge or triangle cookies
- Orange flood icing
- Brown stiff icing for the crust
- White stiff icing for the whipped cream
- Gold sprinkles
Method
- Flood the wedge with orange icing, leaving the curved edge bare. Let it dry for 6 to 8 hours.
- Pipe a row of small brown dots or a rope along the curved edge for the crust.
- Pipe a white swirl at the wide end for the cream.
- Add a few gold sprinkles while the cream is still wet.
Tip: Set the finished wedges in a circle on a tray with candy corn around them. It looks like a whole pie.
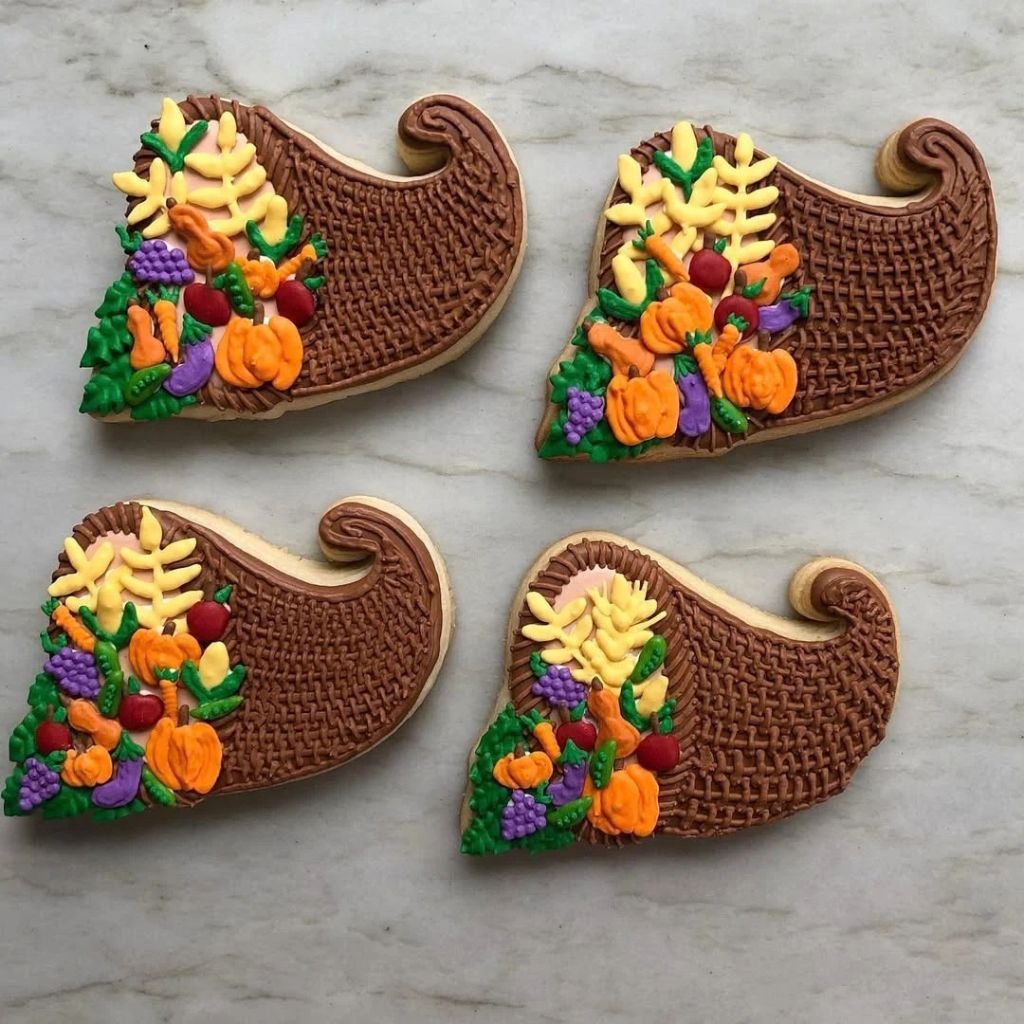
4. Cornucopia Harvest Cookies
A cornucopia is a horn of plenty, filled with fruit and vegetables. The icing basket and the colorful harvest pouring out make each cookie look like a mini centerpiece.
Tools and Colors
- Baked cornucopia shaped cookies
- Brown outline and flood icing
- Orange, purple, green, yellow, and red icing for the harvest
- A basketweave tip or a small round tip
How to Decorate
- Flood the basket area with brown icing. Let it set for 1 hour.
- Pipe a crisscross pattern over it for the woven look.
- Pipe the mouth of the horn, then fill it with a pumpkin, grapes, leaves, and corn.
- Let the harvest dry for several hours.
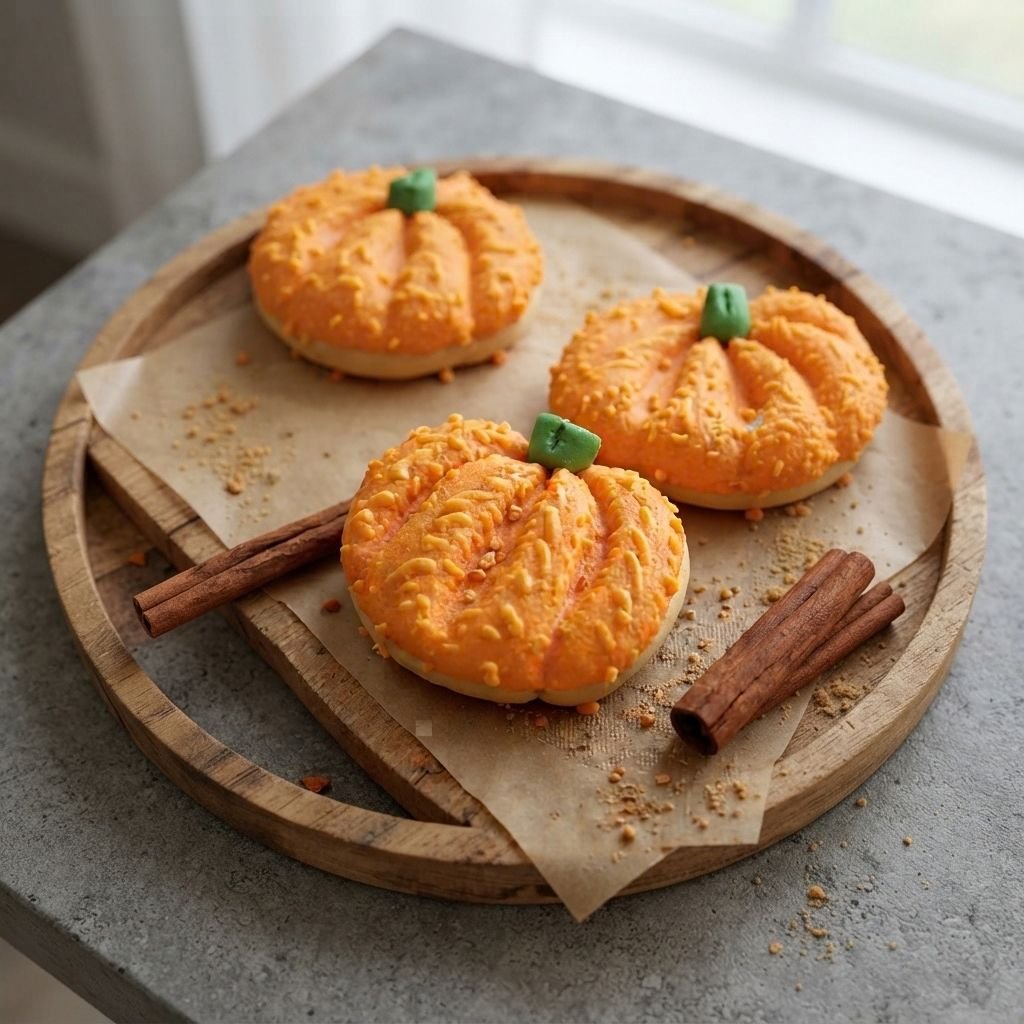
5. Pumpkin Swirl Cookies
These look like tiny pumpkins sitting on the table. Orange frosting piped in curved ridges gives them the shape, and a green stem finishes them.
Shopping List
- Baked round cookies
- 1 cup butter frosting: ½ cup butter, 2 cups powdered sugar, 1 tablespoon milk, 1 teaspoon vanilla
- Orange gel color
- Green icing or a small green candy for the stem
- Piping bag with a round tip
Steps
- Beat the butter, powdered sugar, milk, and vanilla until smooth. Tint it orange.
- Pipe curved lines from the center of the cookie out to the edge, so they look like pumpkin ridges.
- Add a second layer of lines on top for height.
- Press a green stem into the center.
Tip: Chill the cookies for 15 minutes after piping so the ridges hold their shape.
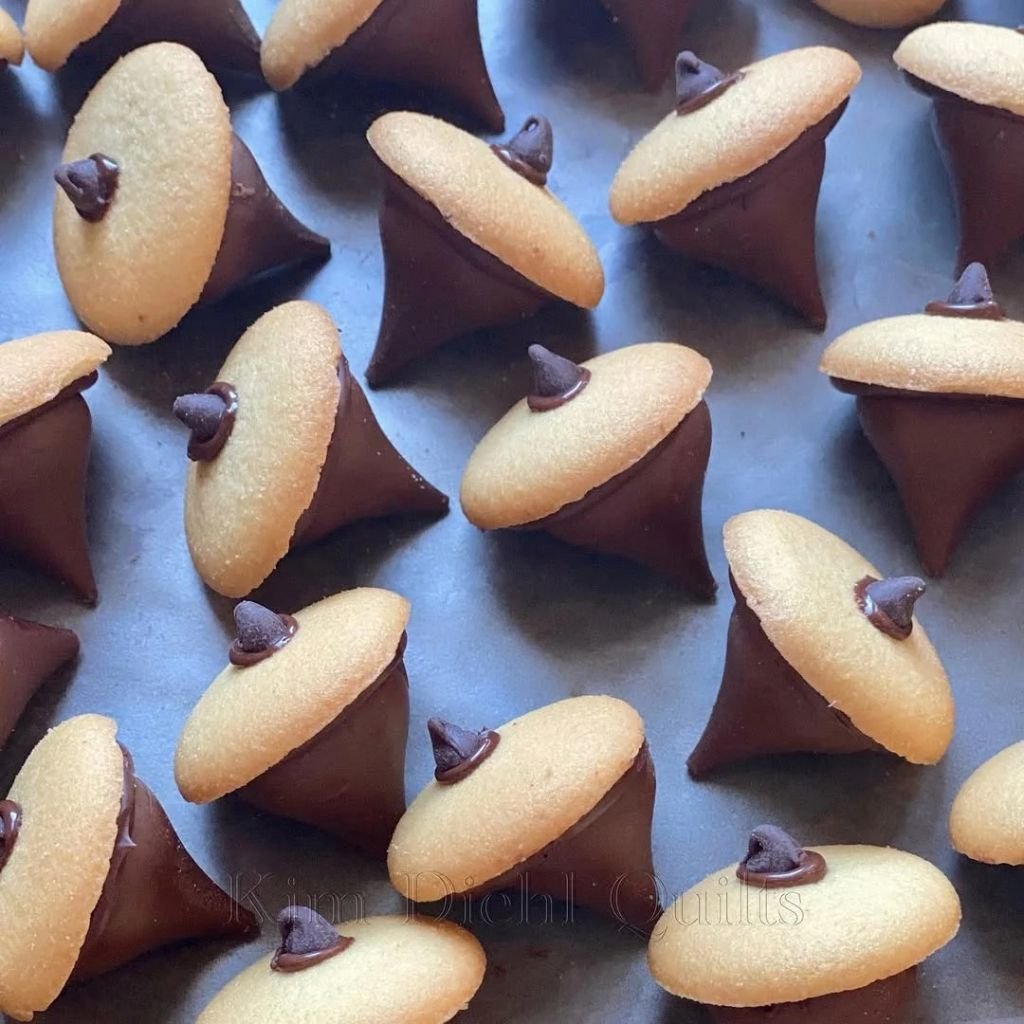
6. Chocolate Acorn Bites
These are the easiest cookies on the list, and kids can make them with almost no help. A mini cookie, a chocolate candy, and a dab of chocolate turn into tiny acorns.
Materials
- Mini round cookies, such as vanilla wafers or mini shortbread
- Chocolate kisses, unwrapped
- A few mini chocolate chips
- ¼ cup melted chocolate, as glue
How It Comes Together
- Dab a little melted chocolate on the flat side of each mini cookie.
- Press a chocolate kiss on top.
- Add a mini chocolate chip at the tip for the stem, if you like.
- Let them set for 15 to 20 minutes.
7. Thanksgiving Cookie Box Mix
This idea is not about icing. It is about the box. A mix of six different cookies in one box makes a gift or a dessert platter that everyone can choose from.
What You’ll Need
- 6 cookie types, baked or bought: orange pumpkin iced, chocolate pecan, caramel apple, marshmallow chocolate, chocolate chip, and cinnamon roll
- A shallow gift box with a lid
- Parchment paper or cupcake liners
- A gift tag or ribbon
Assembly
- Cool all the cookies completely, so the box does not get steamy.
- Line the box with parchment. Set the cookies in rows, with the tallest in the center.
- Place cupcake liners between soft or sticky cookies.
- Close the box, tie on a ribbon, and add a tag with the flavors.
Tip: Keep soft cookies and crisp cookies in separate rows. The soft ones can make crisp cookies lose their snap.

8. Thank You Sprinkle Cookies
A “thank you” cookie says what Thanksgiving is about. White icing makes a clean background, and the pink lettering and little stars give it a fun, handmade look.
Of all these Thanksgiving cookies decorated ideas, this one is the easiest to personalize, since you can write any short word on it, like “grateful” or a guest’s name.
Supply List
- Round baked cookies
- White flood icing
- Pink stiff icing for the lettering
- Pastel icing for small stars
- A toothpick or an edible marker
How to Decorate
- Flood each cookie with white icing and let it dry for 6 to 8 hours.
- Lightly mark the words with a toothpick or edible marker.
- Pipe over the letters with pink stiff icing, using a steady, slow hand.
- Add small four point stars around the words in pastel colors.
- Dry for 2 hours before packing.

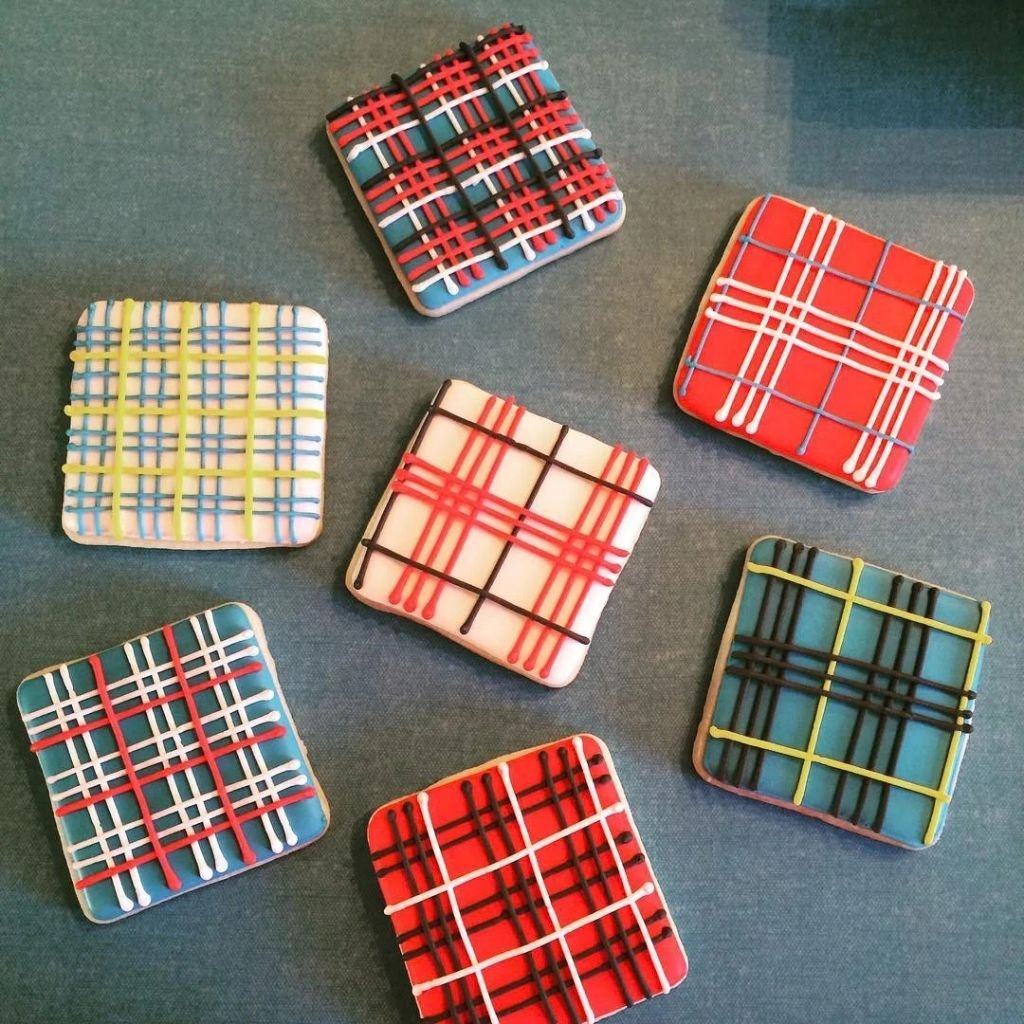
9. Festive Plaid Cookies
Plaid is the pattern of flannel shirts and warm scarves. It looks hard, but it is just lines, laid over each other in layers. Each cookie can have its own color mix.
Items to Grab
- Square baked cookies
- Flood icing in a base color, such as red, cream, or blue
- Stiff icing in lighter and darker shades of the base, plus black or white
- Small round piping tips
Method
- Flood each square with the base color. Let it dry for 6 to 8 hours.
- Pipe wide vertical stripes in a second color. Let them set for 10 minutes.
- Pipe wide horizontal stripes across them.
- Add thin lines in black or white on top, over the crossings.
- Dry for 2 hours.
Tip: Use a ruler or a clean toothpick as a guide for straight lines. Keep a steady speed so the lines stay even.
10. Apple Harvest Cookies
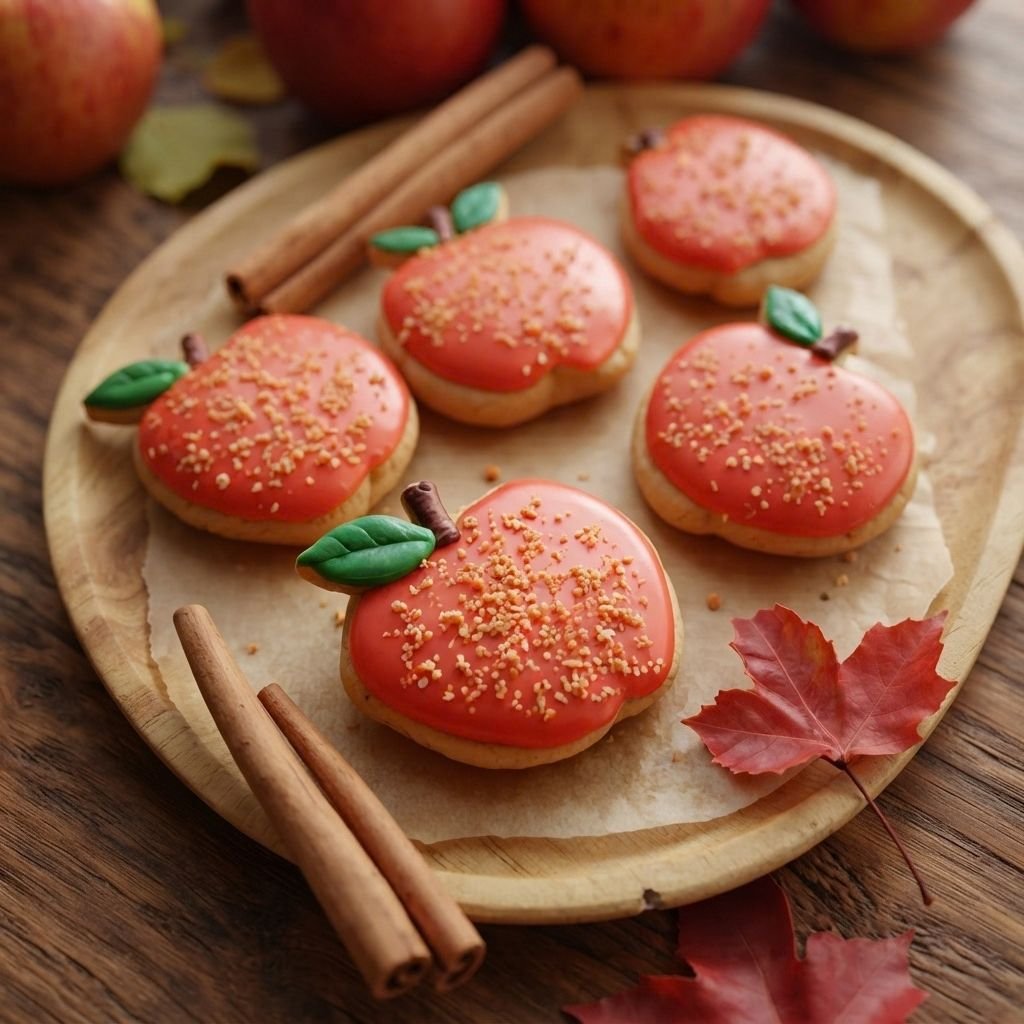
These round, red cookies look like fresh apples from an orchard. A little green leaf and a brown stem finish the look. Set them next to cinnamon sticks and they look like a fall display.
Everything You Need
- Apple shaped baked cookies
- Red flood icing
- Brown stiff icing for the stem
- Green stiff icing for the leaf
- Red sanding sugar, optional
Steps
- Outline the apple with red icing, then flood it. For a sparkly look, sprinkle red sanding sugar on the wet icing right away.
- Let it dry for 6 to 8 hours.
- Pipe a small brown stem at the top.
- Pipe a green leaf next to the stem.
11. Thanksgiving Mini Cookie Tray
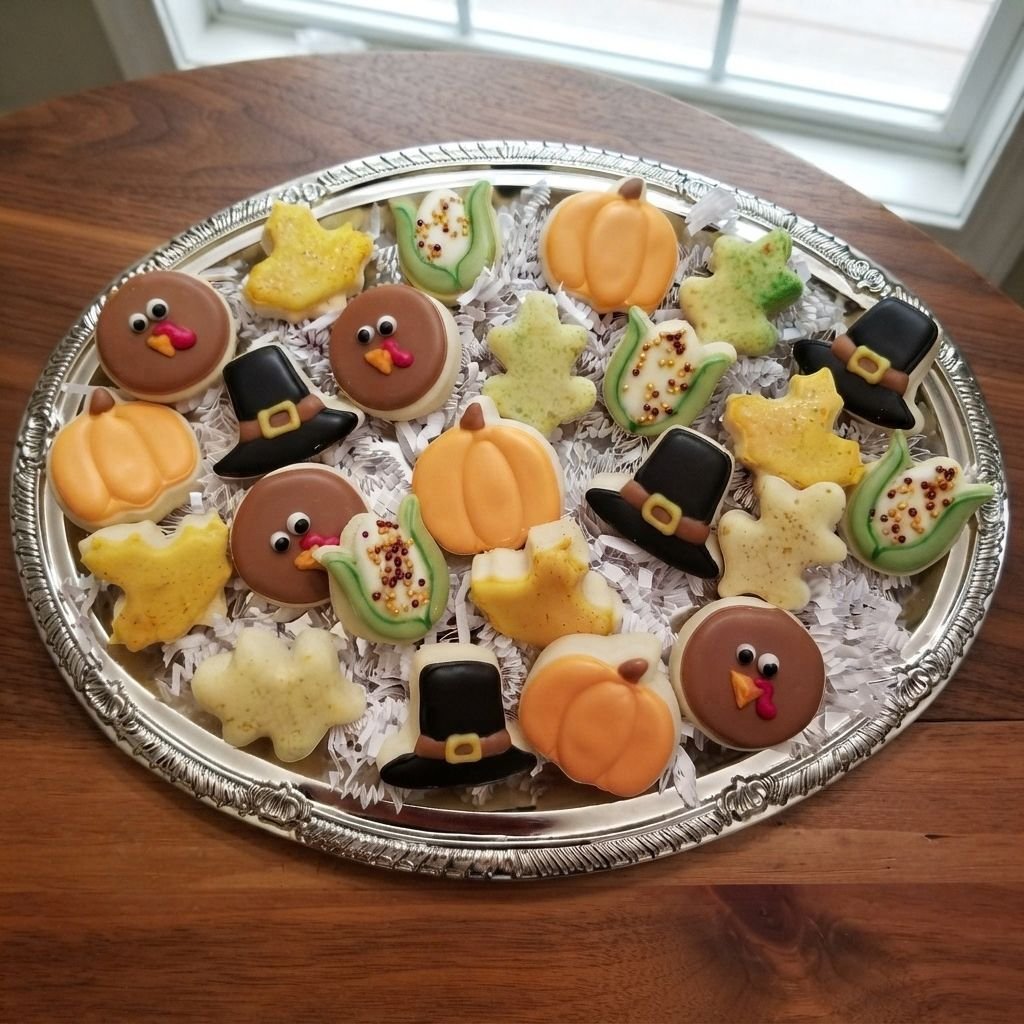
Mini cookies let guests try several shapes without feeling full. A tray with turkeys, pumpkins, pilgrim hats, corn, and leaves looks full of character.
Cutters and Icing
- Mini cookie cutters in turkey, pumpkin, hat, corn, and leaf shapes
- Cookie dough from the base recipe above
- Royal icing in orange, yellow, brown, black, and green
- Sprinkles for the corn kernels
Steps
- Roll and cut the dough with the mini cutters.
- Bake for 6 to 7 minutes. Small cookies bake faster than big ones.
- Flood each shape in a base color and let it dry.
- Add the small details: the hat band, the corn lines, and the turkey face.
- Arrange them on a large platter, with each shape grouped together.
Tip: Do one color at a time across all the cookies. It is much faster than finishing each cookie one by one.
12. Pumpkin Spice Frosted Cookies
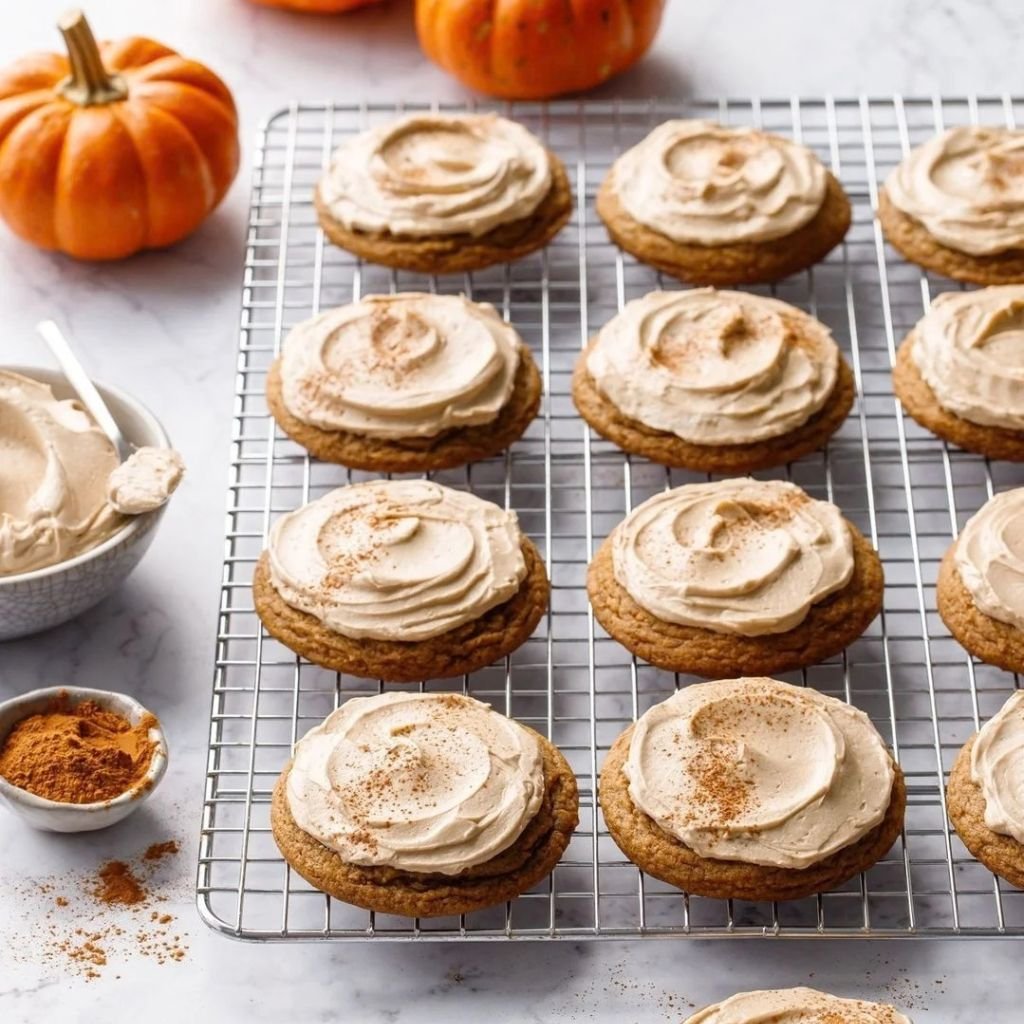
These are soft, cake like cookies with a creamy frosting swirl. They are the easiest “frosted” idea on the list, because there is no waiting for icing to dry.
Cookie Ingredients (makes about 18)
- ½ cup butter, softened
- ¾ cup brown sugar
- 1 egg and 1 teaspoon vanilla
- ½ cup pumpkin puree
- 1¾ cups flour
- 1 teaspoon baking powder and ½ teaspoon baking soda
- 2 teaspoons pumpkin pie spice and ¼ teaspoon salt
Frosting Ingredients
- 4 oz cream cheese and ¼ cup butter, softened
- 2 cups powdered sugar
- 1 teaspoon vanilla and ½ teaspoon cinnamon
How to make them
- Beat the butter and sugar. Mix in the egg, vanilla, and pumpkin.
- Stir in the dry ingredients. Drop spoonfuls onto a lined tray.
- Bake at 350°F for 10 to 12 minutes. Cool fully.
- Beat the frosting ingredients until fluffy and swirl it on top.
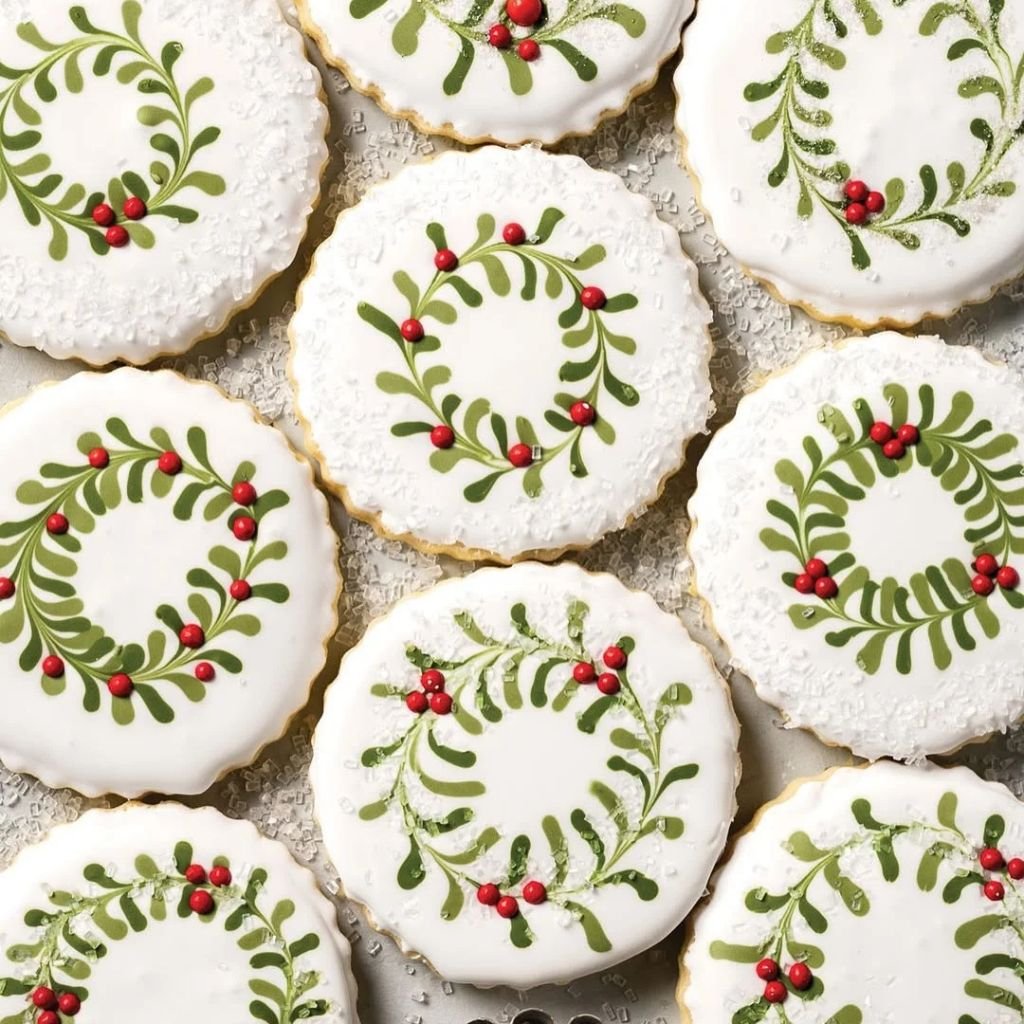
13. Hand Painted Wreath Cookies
A green wreath on white icing looks neat and graceful. Little red dots look like berries. For Thanksgiving, you can use orange and yellow leaves instead of green, to match the season.
Paints and Basics
- Round baked cookies
- White flood icing
- Green, red, and gold gel color mixed with a few drops of clear extract
- A thin paintbrush
- Red sugar pearls, optional
Method
- Flood the cookies with white and let them dry for 6 to 8 hours.
- Dip the brush in green paint and make a ring of small leaf strokes around the edge.
- Add small dots of red between the leaves for berries.
- Press on sugar pearls for extra shine.
- Let them dry for 1 hour.
Tip: Paint each leaf with one quick stroke. Going over the same leaf twice makes it look messy.
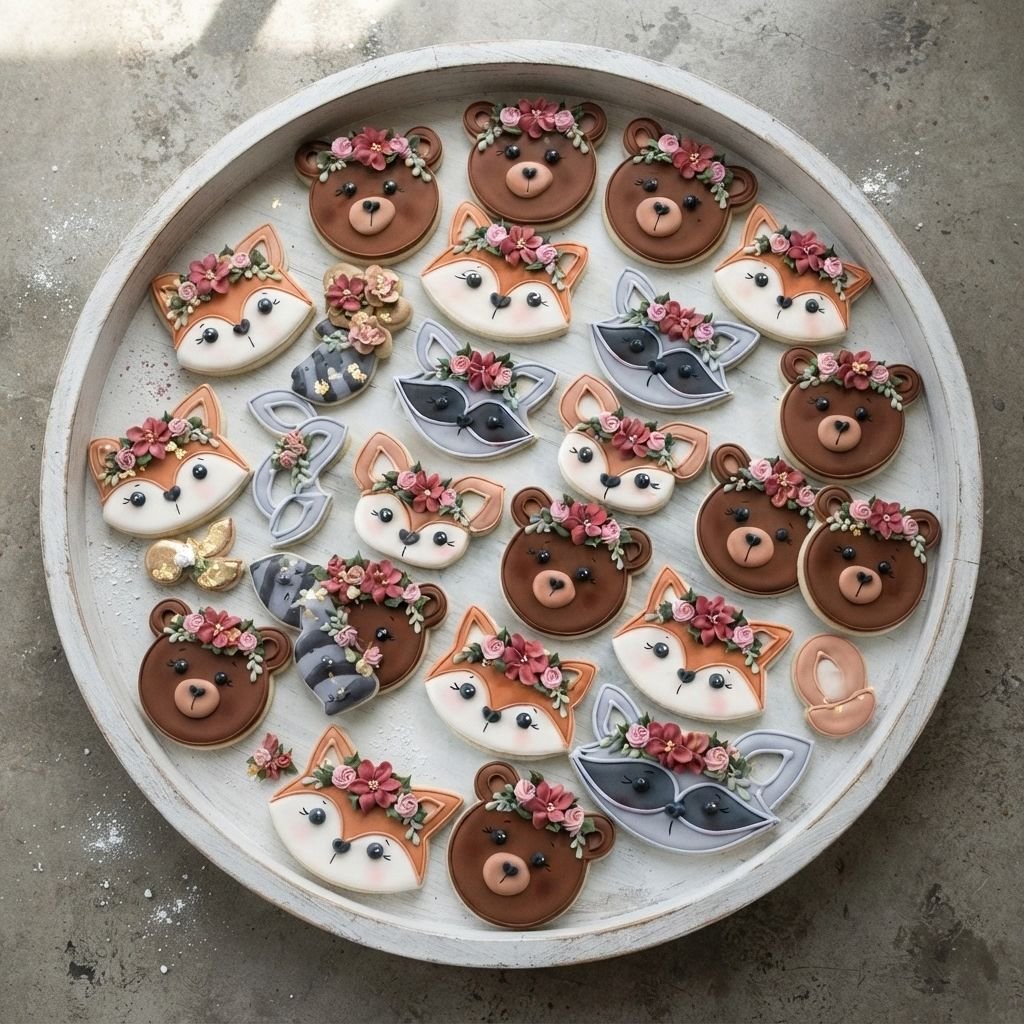
14. Woodland Friends Cookies
These cookies have cute animal faces with little flower crowns. They are a favorite with kids and with anyone who loves a sweet, storybook look.
Icing Colors and Tools
- Round baked cookies
- Flood icing in the animal colors
- Small piping tips, size 1 or 2
- Pink, white, and green icing for the flower crowns
How to Decorate
- Flood each cookie with the animal’s base color. Let it dry for 6 to 8 hours.
- Pipe the ears, muzzle, and face markings in a second color.
- Add black dots for the eyes and a small nose.
- Finish with a crown of tiny flowers and leaves.
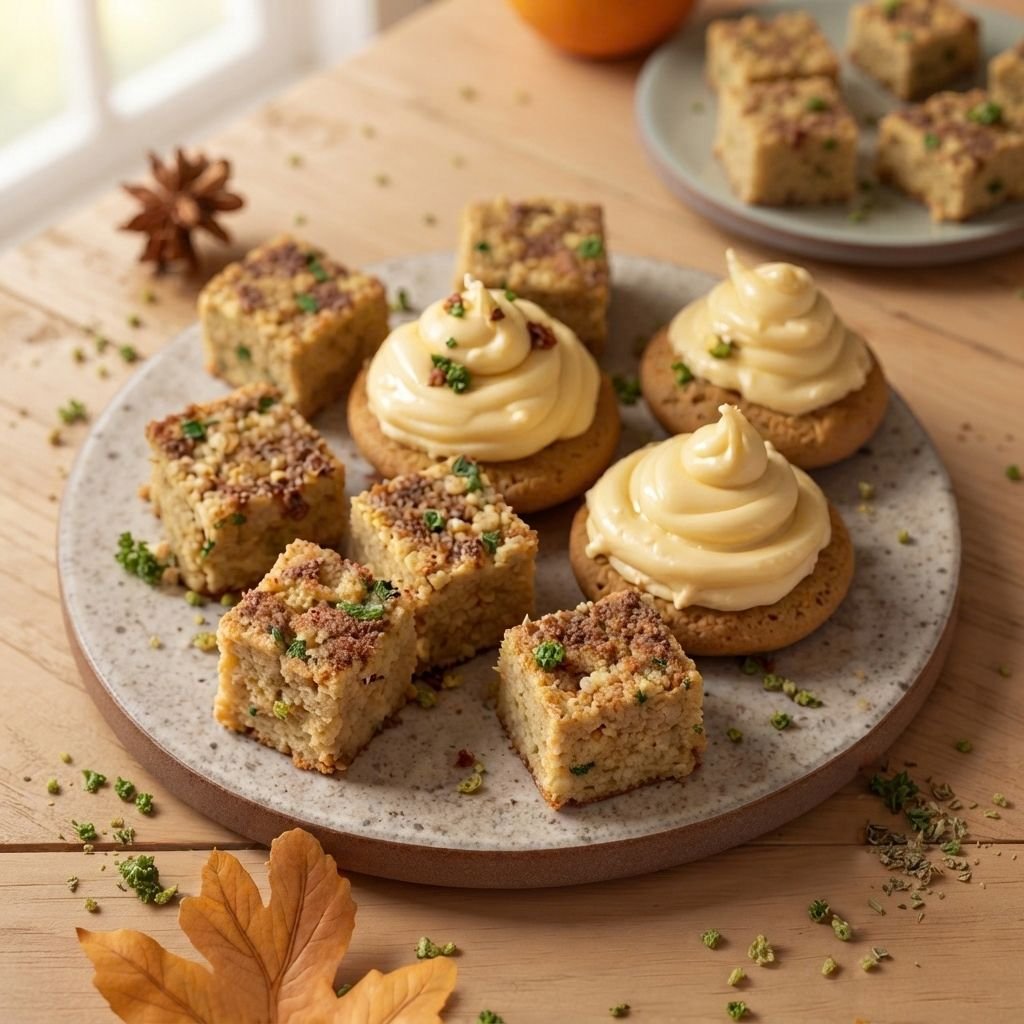
15. Spiced Harvest Cookies Bites
These bites have two textures: crumbly spiced shortbread squares and soft frosted rounds. They are easy to make in one pan and look good on a rustic plate with fall leaves.
Pantry and Craft Drawer
- 1 cup butter, softened
- ½ cup sugar
- 2 cups flour
- 1 teaspoon cinnamon, ½ teaspoon ginger, ¼ teaspoon nutmeg, and a pinch of salt
- Frosting from idea 12, or any cream cheese frosting
- Chopped pistachios for topping, optional
Steps
- Heat the oven to 325°F. Mix the butter and sugar, then stir in the flour, spices, and salt.
- Press the dough into a lined 8 inch square pan.
- Bake for 30 to 35 minutes until the edges are light golden. Cool fully, then cut into squares.
- Swirl frosting on top of some squares, and sprinkle with pistachios.
Tip: Cut the squares while the shortbread is still slightly warm. It breaks less than when it is cold.
4 COOKIE DECORATING MISTAKES AND HOW TO FIX THEM
Almost every beginner runs into the same few problems. Here is how to solve them.
HOW TO STORE, PACK, AND GIFT YOUR COOKIES
Let iced cookies dry completely, ideally overnight, before you stack or box them. Wet icing sticks and smudges.
- Royal iced cookies: store in a single layer or with parchment between layers, in an airtight container at room temperature, for about 5 to 7 days.
- Cream cheese frosted cookies (like idea 12): keep them in the fridge and eat within 3 to 4 days.
- Dough: wrap cut out dough and freeze for up to 3 months. Thaw in the fridge overnight.
- Gifting: use a box lined with parchment, and a small label that names the cookie flavors.
Tip: If you are baking for a large Thanksgiving table, plan to decorate at least 2 days before. The cookies taste better after a day of resting.
A 3 DAY BAKING PLAN
Spread the work over three days, and Thanksgiving week will feel much easier.
FREQUENTLY ASKED QUESTIONS
1. How far ahead can I make Thanksgiving cookies?
You can freeze the dough for up to 3 months. Baked, undecorated cookies keep for about a week in an airtight container. Decorated royal icing cookies are best made 2 to 4 days before the event.
2. Do I need to use meringue powder in the icing?
It is the safest choice. Meringue powder gives a hard, stable icing without raw egg whites. You can find it in the baking aisle or online.
3. What if I am a beginner?
Start with the easy cookies: the acorn bites, the cookie box mix, the pumpkin spice cookies, or the spiced cookie bites. They need no piping skill.
4. Why did my icing get craters or cracks?
This usually happens when the icing is too thin, or when it dries too fast. Add a little more powdered sugar, and let the cookies dry in a room with no strong air flow.
5. Can I use store bought cookies?
Yes. Plain sugar cookies from the store work well for the cookie box, the acorn bites, and any idea where you only add frosting or candy.
6. How do I make kid friendly cookies?
Let kids add the sprinkles, candy eyes, and mini chocolate chips. The acorn bites and the pumpkin spice cookies are the best choice for small helpers.
CONCLUSION
A tray of decorated cookies can become the most talked about part of your Thanksgiving table. You do not need to master every technique. Choose two or three Thanksgiving cookie decorating ideas that fit your time and skill, and add a simple one, like the acorn bites, for balance.
Plan your baking over 3 days, and the work stays calm and fun. Bring the kids in for the sprinkles and the eyes.
Save this list so you always have a cookie idea ready when the holiday season comes around again.