Easy Fried Chicken Legs Recipe: Extra Crispy, Juicy, and Better Than Takeout
There is something undeniably comforting about sinking your teeth into a perfectly fried piece of chicken. The audible crunch of a highly textured, golden-brown crust giving way to tender, juicy meat is a culinary experience like no other. Once you try this easy fried chicken legs recipe at home, you’ll likely never want to rely on the drive-thru or standard takeout again.
Whether you’re preparing a hearty family dinner, putting together a weekend picnic, or styling a mouthwatering, rustic spread for your culinary content creation, homemade fried chicken is a guaranteed crowd-pleaser. The deep, golden crust and vibrant garnishes look absolutely incredible on a plate—and even better on camera. The best part? Achieving that restaurant-quality crunch is much easier than you might think. Let’s walk through everything step-by-step so you can master perfectly crispy fried chicken drumsticks on your very first try.
Why Make Fried Chicken Legs at Home?
If you’ve only ever bought fried chicken from a fast-food joint, you are missing out on the magic of making it fresh. Homemade fried chicken is:
- Incredibly crispy: It goes straight from the pan to your plate, meaning no soggy breading from a takeout box.
- Perfectly seasoned: You control the spice blend, salt levels, and heat.
- Made with fresh oil: You know exactly what it’s being fried in.
- Budget-friendly: A pack of chicken drumsticks is one of the most economical cuts of meat available.
- Visually stunning: Fresh out of the fryer, it boasts a gorgeous, highly textured, golden crust that is visually inviting.
The flavor difference is immediate. The crunch is louder, the meat is juicier, and the satisfaction of making it yourself is unbeatable.
Ingredients for Easy Fried Chicken Legs
The secret to this recipe is the combination of a simple buttermilk marinade to tenderize the meat and a touch of cornstarch in the breading for maximum crunch. You’ll need:
For the Chicken & Marinade:
- 8 to 10 bone-in, skin-on chicken drumsticks (legs)
- 2 cups buttermilk (or 2 cups of milk mixed with 2 tablespoons of white vinegar)
- 1 tablespoon hot sauce (optional, for a subtle kick)
For the Crispy Breading:
- 2 cups all-purpose flour
- 1/2 cup cornstarch (the secret to an ultra-crispy crust)
- 1 tablespoon paprika
- 1 tablespoon garlic powder
- 1 tablespoon onion powder
- 1 teaspoon dried oregano or thyme
- 1 tablespoon salt and 1 teaspoon freshly ground black pepper
For Frying:
- Neutral frying oil (like peanut, vegetable, or canola oil)
Step-by-Step Easy Fried Chicken Legs Recipe
Follow these simple steps for golden, crispy, and thoroughly cooked chicken every single time.
Step 1: Marinate the Chicken In a large bowl, whisk together the buttermilk and hot sauce. Submerge the chicken drumsticks in the liquid. Cover the bowl and refrigerate for at least 1 hour, though 4 hours or even overnight yields the most tender, flavorful meat.
Step 2: Prepare the Breading Station In a large, shallow dish, whisk together the flour, cornstarch, paprika, garlic powder, onion powder, dried herbs, salt, and black pepper. Stir until the spices are evenly distributed throughout the flour.
Step 3: Dredge the Chicken Remove a drumstick from the buttermilk, letting the excess drip off. Place it into the seasoned flour mixture. Use your hands to pack the flour tightly onto the chicken, ensuring every crevice is coated. Shake off the excess flour and place the breaded chicken on a wire rack. Pro Tip: Let the breaded chicken sit for 15 minutes before frying. This helps the crust adhere and prevents it from falling off in the oil.
Step 4: Heat the Oil Fill a heavy-bottomed pot, Dutch oven, or deep skillet with about 2 inches of oil. Heat the oil over medium-high heat until it reaches 350°F (175°C). If you drop a tiny pinch of flour into the oil, it should sizzle immediately.
Step 5: Fry to Golden Perfection Carefully lower the chicken legs into the hot oil using tongs. Do not overcrowd the pan; work in batches if necessary (usually 3 to 4 legs at a time). Fry for 12 to 15 minutes, turning occasionally, until the crust is a deep golden brown and the internal temperature of the meat reaches 165°F (74°C).
Step 6: Drain and Serve Remove the cooked chicken from the oil and place it on a clean wire cooling rack set over a baking sheet (avoid placing it on paper towels, which can trap steam and make the bottom soggy). Let it rest for 5 to 10 minutes before serving.
Pro Tips for Perfect Crispy Fried Chicken
Small details make a massive difference when frying at home:
- Use a meat thermometer: It’s the only foolproof way to know the chicken is juicy and safe to eat on the inside without cutting it open.
- Don’t overcrowd the pot: Adding too much chicken at once drops the oil temperature, leading to greasy, heavy breading.
- The cornstarch is mandatory: Flour alone will brown nicely, but cornstarch shatters when you bite into it, giving you that iconic takeout-style crunch.
- Double-dip for extra crust: If you love a highly textured, craggy crust, dip the chicken back into the buttermilk and flour a second time before resting.
How to Store and Reheat Leftovers
Fresh fried chicken is best enjoyed immediately, but leftovers can be saved! Store completely cooled chicken in an airtight container in the refrigerator for up to 3 days.
To Reheat: Never use the microwave, or the crust will turn rubbery. Place the chicken on a wire rack over a baking sheet and bake at 400°F (200°C) for 15 minutes. Alternatively, an air fryer set to 375°F (190°C) for 5-7 minutes will brilliantly revive the crunch.
Ways to Serve Fried Chicken Legs
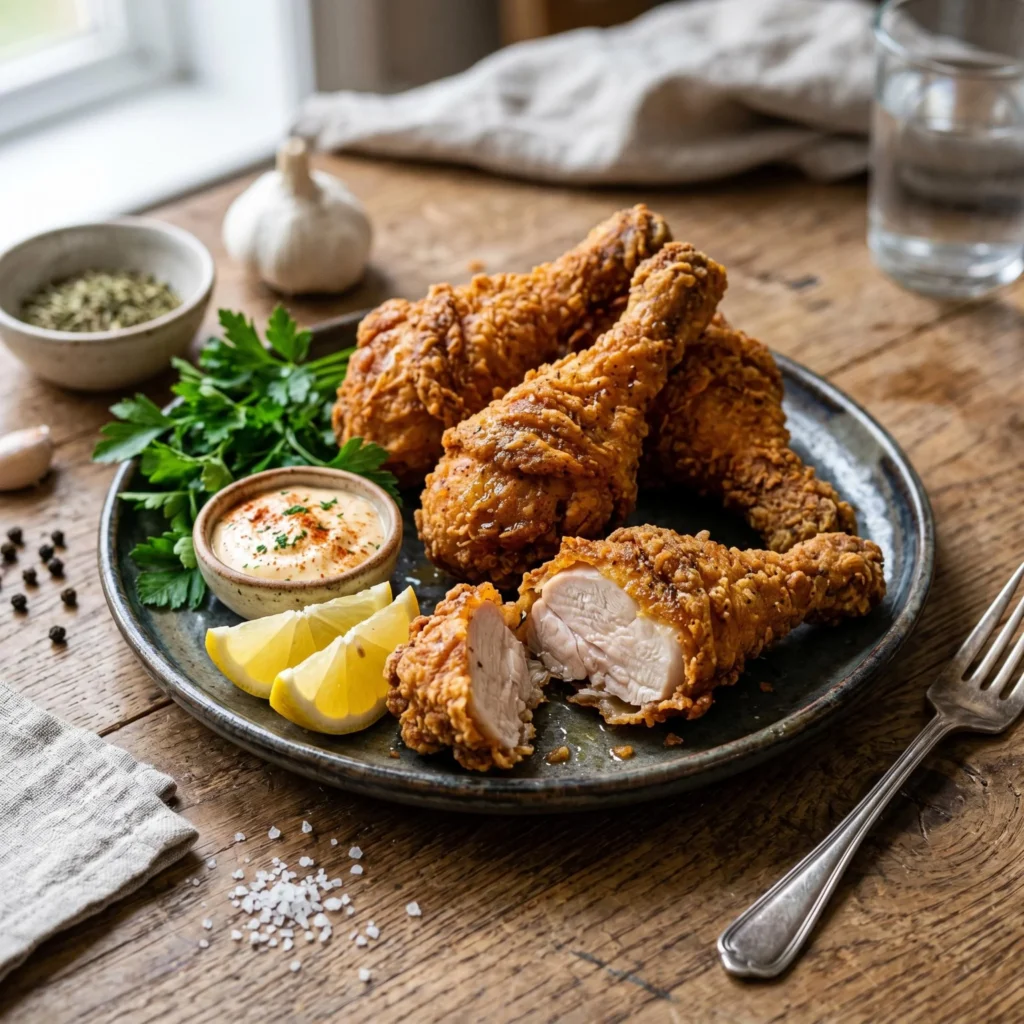
To truly elevate this dish—especially if you are styling it for a beautiful meal presentation—serve the golden drumsticks on a rustic ceramic plate alongside thoughtful garnishes.
- Dipping Sauces: Serve with a small ramekin of creamy, paprika-dusted mayonnaise, spicy aioli, or classic ranch.
- Fresh Garnishes: Brighten the heavy, savory notes of the chicken with a handful of fresh green parsley and bright lemon wedges squeezed over the top right before eating.
- Classic Sides: Pair with creamy mashed potatoes, buttery corn on the cob, or a crisp, tangy coleslaw to cut through the richness.
Frequently Asked Questions
Why is my bread falling off? This usually happens if the chicken goes straight from the flour into the fryer. Letting the breaded chicken rest on a wire rack for 10-15 minutes before frying allows the buttermilk and flour to hydrate and form a paste, locking the breading to the skin.
Why is my chicken dark on the outside but raw on the inside? Your oil was likely too hot. If the oil is above 350°F, the outside will burn before the heat can penetrate to the bone. Keep an eye on your heat and adjust the burner as needed to maintain a steady temperature.
Can I use a deep fryer? Absolutely. A tabletop deep fryer takes all the guesswork out of temperature control and works wonderfully for this recipe.
Final Thoughts
This easy fried chicken legs recipe proves that restaurant-quality crunch is entirely achievable in your own kitchen. With a simple buttermilk soak, a perfectly seasoned breading, and a little patience at the stove, you can create juicy, tender chicken enveloped in a deeply satisfying, golden-brown crust.
Once you pull that first batch out of the hot oil, smelling the savory spices and hearing the crackle of the crust, you’ll understand why homemade is always worth the effort. So heat up your oil, prep your breading station, and enjoy the pure, comforting joy of making spectacular fried chicken from scratch.