Simple Oreo Dessert Cups Recipe
If you love creamy desserts with layers of chocolate, cookies, and smooth filling, these Oreo Dessert Cups are the perfect sweet treat to make at home.
Each cup combines a crunchy Oreo cookie base, a rich cookies-and-cream filling, a silky chocolate layer, and fluffy whipped cream topped with a classic Oreo cookie. The best part? No oven is needed, and the whole dessert comes together with simple ingredients.
These individual dessert cups are perfect for birthdays, holidays, family gatherings, or whenever you want a beautiful dessert without spending hours in the kitchen. They look impressive on a dessert table, but the preparation is surprisingly easy.
Why You’ll Love This Oreo Dessert Cups Recipe
These Oreo Dessert Cups are the perfect combination of creamy, crunchy, and chocolatey. They have the look of a fancy dessert but are simple enough for anyone to make at home.
Whether you are preparing a quick family treat or a dessert table for a celebration, these individual cups make serving easy and mess-free.
No Baking Required
No oven, complicated baking steps, or special skills needed. Simply prepare the layers, chill, and enjoy.
Rich Oreo Chocolate Flavor
The combination of crushed Oreos, chocolate, and creamy filling creates a dessert packed with classic cookie flavor.
Perfect Individual Servings
Each dessert cup is ready to serve, making it ideal for parties, birthdays, holidays, and gatherings.
Great Make-Ahead Dessert
Prepare these cups in advance, keep them chilled, and serve whenever you need an easy dessert.
Looks Beautiful With Minimal Effort
The clear layers create a bakery-style presentation without complicated decorating techniques.
Loved By Everyone
The familiar Oreo flavor and creamy texture make this a dessert that both kids and adults enjoy.
No Bake
Easy preparation
Chocolate Rich
Oreo flavor in every bite
Individual Cups
Perfect serving size
Party Ready
Beautiful dessert table idea

Ingredients for Oreo Dessert Cups
Each ingredient in these Oreo Dessert Cups has an important role. The Oreo cookies create the chocolate base, the cream filling adds a smooth cheesecake-like texture, and the chocolate topping gives the dessert a rich finishing touch.
Main Ingredients
Oreo Cookies
Oreo cookies create the crunchy chocolate base and add that classic cookies-and-cream flavor throughout the dessert.
Melted Butter
Butter helps bind the crushed Oreo crumbs together so the base holds its shape while staying easy to scoop.
Cream Cheese
Softened cream cheese creates a rich, creamy filling with a smooth cheesecake-style texture.
Powdered Sugar
Adds sweetness while blending easily into the cream cheese without leaving a grainy texture.
Vanilla Extract
A small amount of vanilla enhances the creamy filling and balances the chocolate flavor.
Heavy Whipping Cream
Whipped cream makes the filling lighter, softer, and more airy.
Melted Chocolate or Chocolate Ganache
Adds an extra chocolate layer that makes the dessert more indulgent and visually appealing.
Whipped Topping
Creates the fluffy final layer and gives the dessert a bakery-style appearance.
Extra Oreos & Chocolate Chips
Used for decoration and add extra crunch and texture.
Ingredient List
- 24 Oreo cookies
- 3 tablespoons melted butter
- 8 ounces cream cheese, softened
- ½ cup powdered sugar
- 1 teaspoon vanilla extract
- 1 cup heavy whipping cream
- ½ cup melted chocolate or chocolate ganache
- 1 cup whipped topping or extra whipped cream
- 6 whole Oreos for topping
- Mini chocolate chips or Oreo crumbs (optional)
Chocolate cookie base
Smooth creamy filling
Rich dessert layer
Light fluffy finish
Best Cups to Use for Oreo Dessert Cups
The right serving cups can make this simple dessert look like a bakery-style treat. Since Oreo Dessert Cups are all about beautiful layers, clear containers work best because they allow everyone to see the crunchy cookie base, creamy filling, chocolate layer, and whipped topping.
Clear Glass Dessert Cups
These are the best option for special occasions. They create an elegant presentation and make every layer visible.
Mini Dessert Jars
Small glass jars are perfect for parties and can be covered with lids if you are preparing them ahead of time.
Clear Plastic Party Cups
A practical choice for birthdays, gatherings, and large events. They are easy to serve and clean up afterward.
Mini Trifle Cups
These give the dessert a more premium look and provide enough space for multiple beautiful layers.
Small Serving Bowls
If you do not have individual cups, small bowls work perfectly and are great for home serving.
Tips for Choosing Cups
✔ Use clear cups to show the Oreo layers.
✔ Choose cups around 4–6 ounces for the perfect serving size.
✔ Avoid very deep cups because the layers become harder to scoop.
✔ Prepare cups with straight sides for cleaner-looking layers.
Glass Cups
Elegant layers
Dessert Jars
Perfect for make-ahead
Party Cups
Easy serving
Trifle Cups
Premium look
Step-by-Step Oreo Dessert Cups Recipe
Step 1: Crush the Oreo Cookies
Start by separating about 24 Oreo cookies and crushing them into fine crumbs using a food processor. If you do not have one, place the cookies inside a sealed bag and crush them with a rolling pin.
Keep a few tablespoons of Oreo crumbs aside for decorating the finished dessert cups.
Why This Step Matters:
Fine Oreo crumbs create a smooth, even base and help every layer hold together beautifully.
Quick Tip:
Do not leave large cookie pieces in the base because they can make the layers harder to scoop.

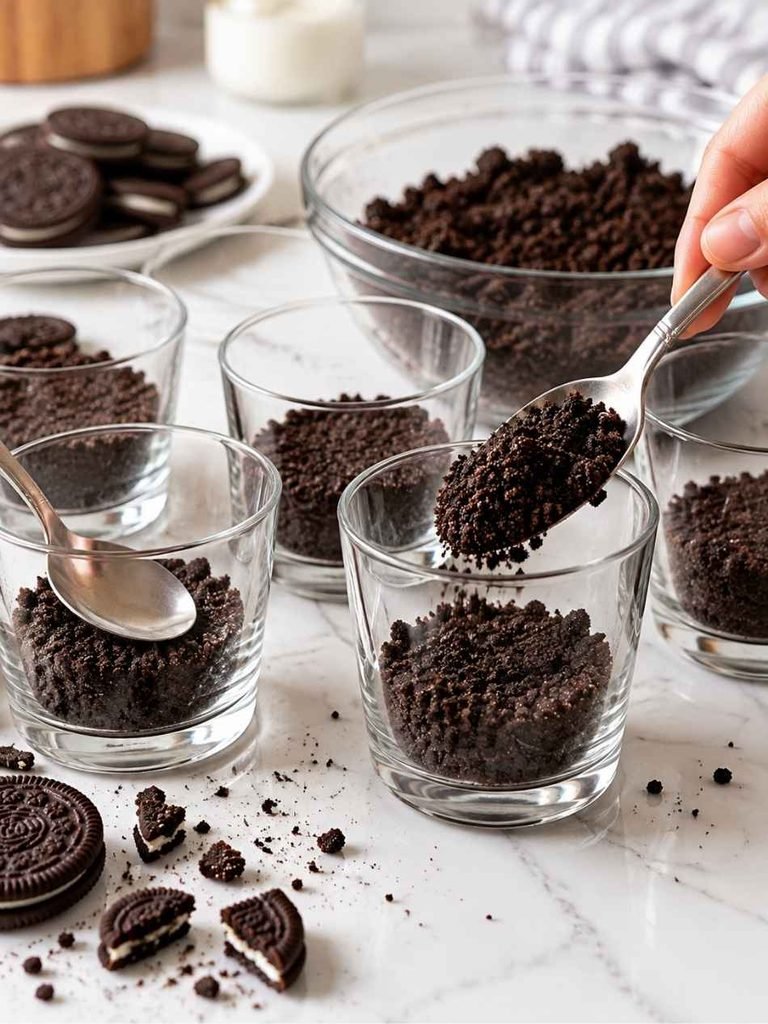
Step 2: Prepare the Oreo Crust
Add melted butter to the crushed Oreos and mix until the crumbs look slightly moist and resemble wet sand.
Divide the mixture between your dessert cups and gently press it down using the back of a spoon.
Why This Step Matters:
The butter helps bind the Oreo crumbs together while keeping the crust rich and chocolatey.
Quick Tip:
Press gently. A tightly packed crust can become too hard after chilling.
Step 3: Make the Cookies and Cream Filling
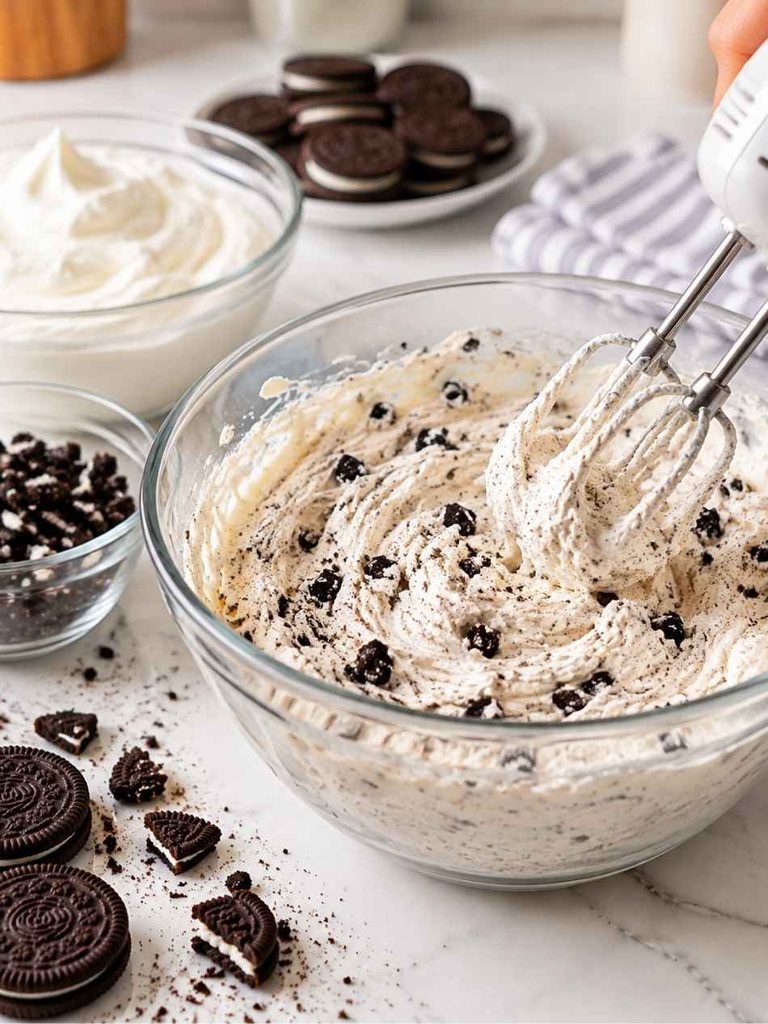
In a mixing bowl, beat the softened cream cheese until smooth and creamy. Add powdered sugar and vanilla extract, then mix until fully combined.
In another bowl, whip the heavy cream until soft peaks form. Carefully fold the whipped cream into the cream cheese mixture.
Add crushed Oreo pieces and gently mix to create the cookies-and-cream filling.
Why This Step Matters:
Folding the whipped cream keeps the filling light and fluffy instead of dense.
Quick Tip:
Make sure the cream cheese is softened before mixing to avoid lumps.
Step 4: Add the Creamy Filling Layer
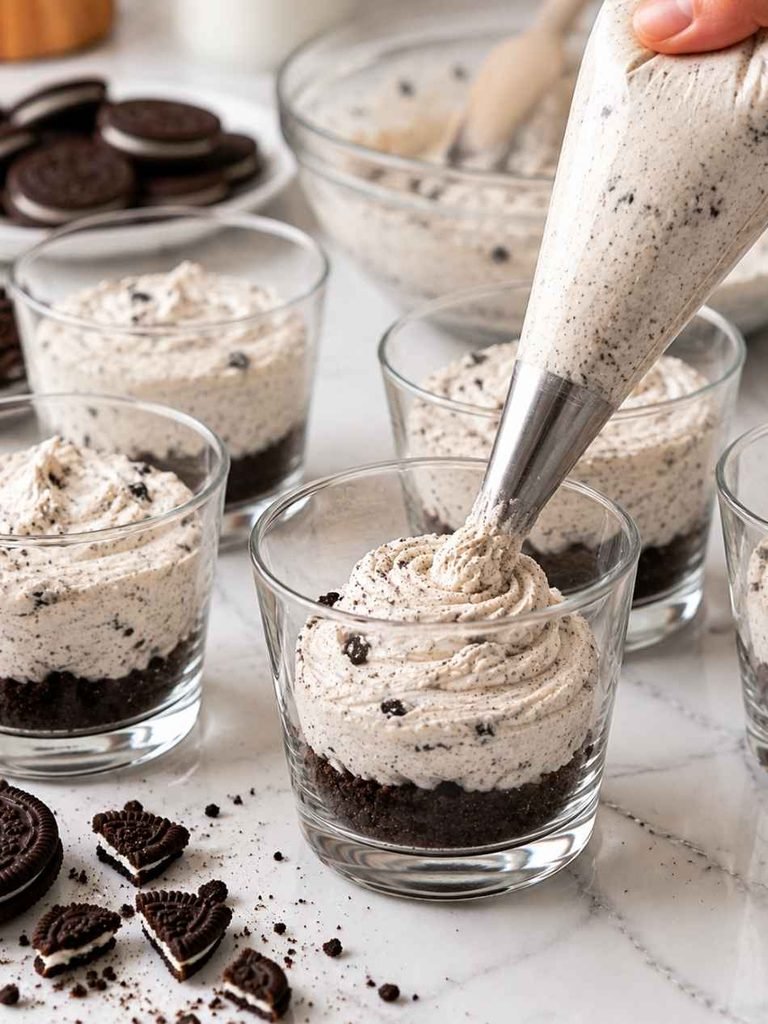
Spoon or pipe the Oreo cream filling over the prepared cookie crust in each cup.
Fill each cup about two-thirds full, leaving enough space for the chocolate layer and whipped cream topping.
Smooth the surface gently with a spoon or spatula.
Why This Step Matters:
A smooth filling layer creates clean, beautiful dessert layers.
Quick Tip:
Use a piping bag if you want a cleaner bakery-style appearance.
Step 5: Add the Chocolate Layer
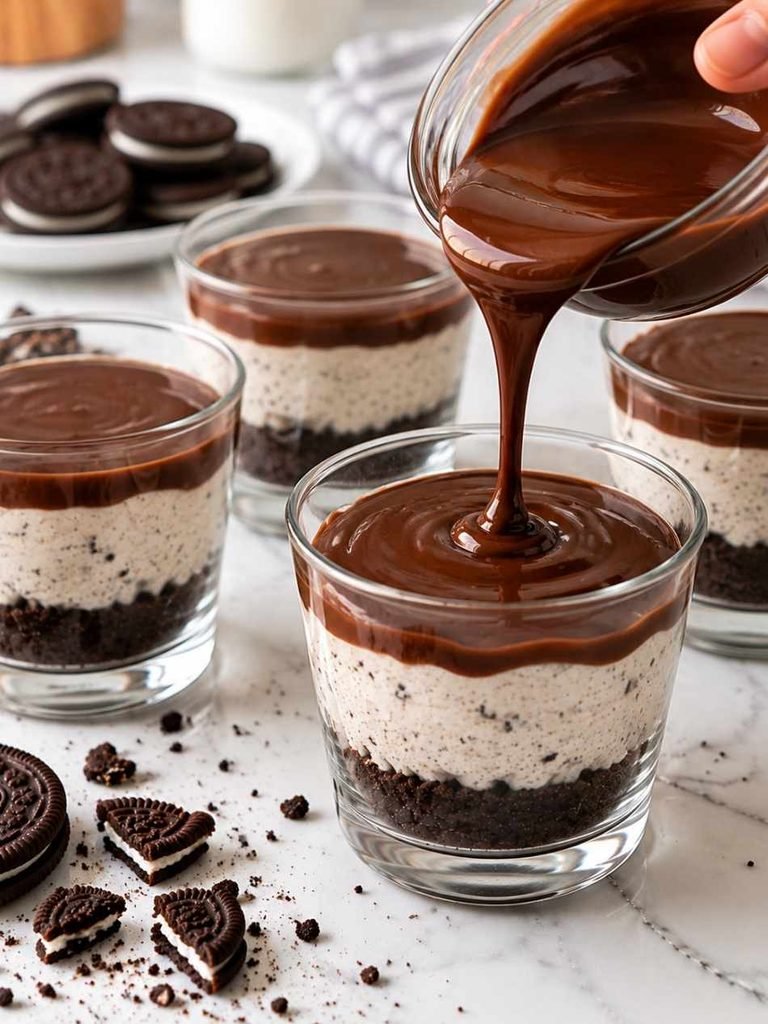
Melt the chocolate slowly in the microwave using short intervals, stirring between each one until smooth.
Add a thin layer of melted chocolate or chocolate ganache over the Oreo filling.
Allow the chocolate layer to spread naturally across the top.
Why This Step Matters:
The chocolate layer adds extra richness and creates a beautiful contrast between the creamy and cookie layers.
Quick Tip:
Let melted chocolate cool slightly before adding it so it does not soften the cream layer.
Step 6: Add the Whipped Cream Topping
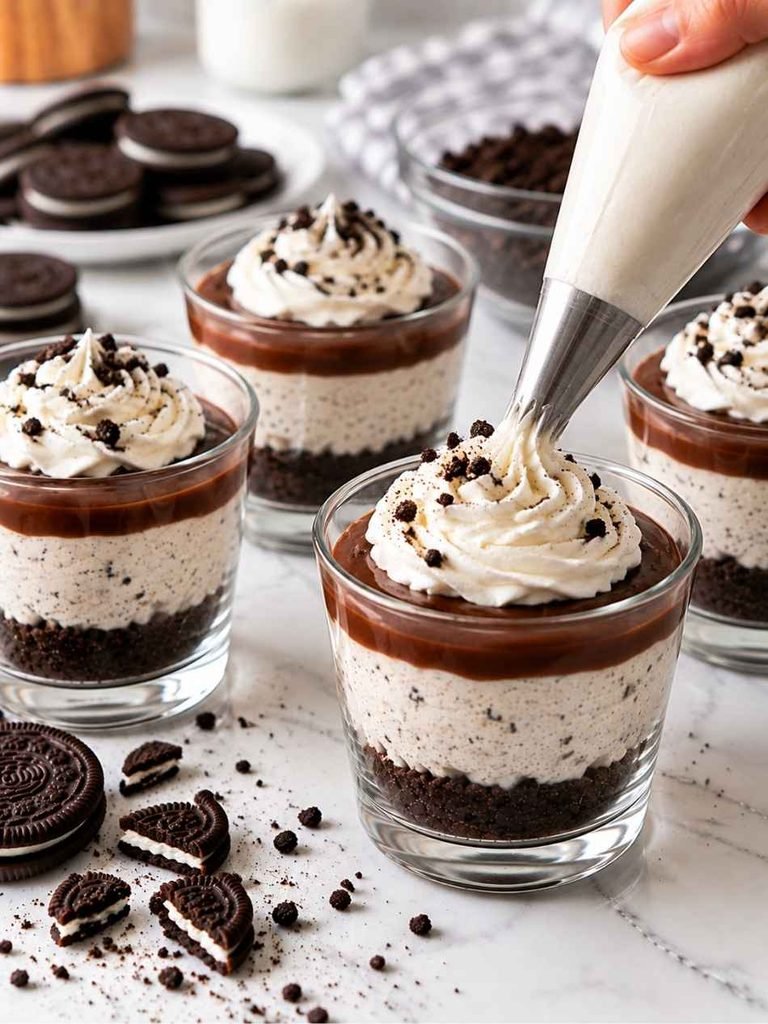
Top each dessert cup with whipped cream or whipped topping.
You can pipe the cream into a swirl for a more decorative finish or simply spoon it on top.
Why This Step Matters:
The whipped cream adds a light, airy texture that balances the rich Oreo and chocolate flavors.
Quick Tip:
Chill the whipped cream before decorating for a more stable topping.
Step 7: Decorate the Dessert Cups
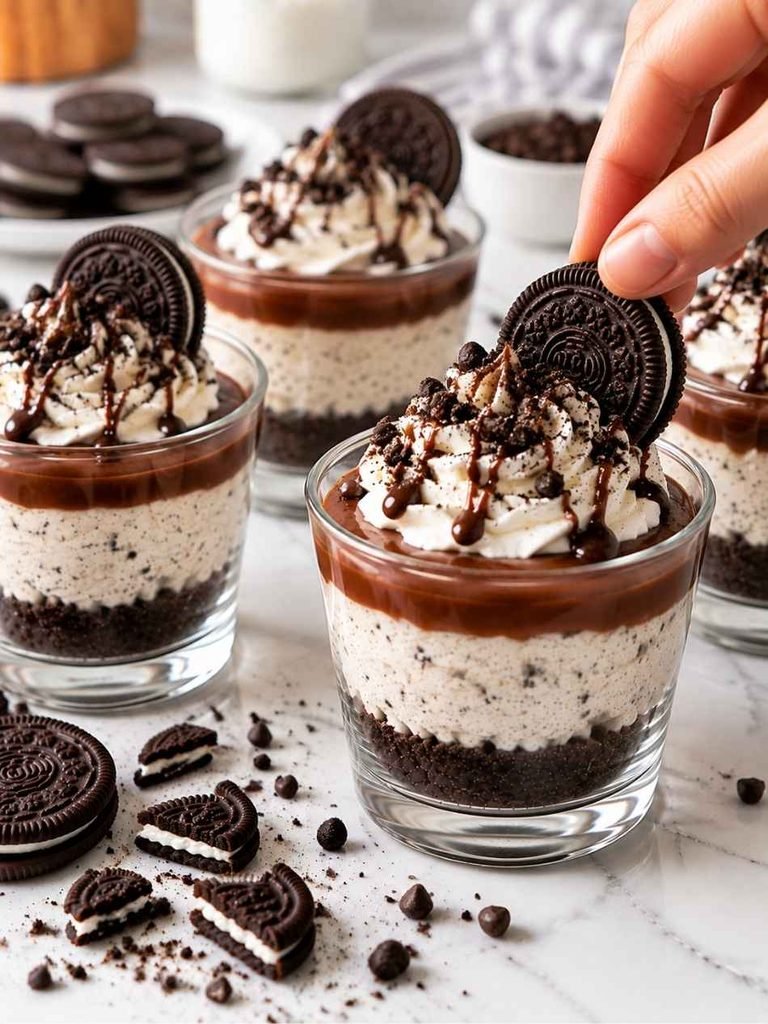
Finish each cup with a whole Oreo cookie, Oreo crumbs, mini chocolate chips, or a drizzle of melted chocolate.
Arrange the toppings just before serving for the freshest appearance.
Why This Step Matters:
The final decoration makes the dessert look special with very little extra effort.
Quick Tip:
Add whole Oreos close to serving time because they soften if left in the refrigerator too long.
Step 8: Chill and Serve
Cover the dessert cups and refrigerate for at least 1 hour before serving.
Chilling allows the layers to set and helps all the flavors come together.
Serve cold and enjoy the creamy Oreo layers with every spoonful.
Why This Step Matters:
Resting time gives the dessert the perfect texture and makes it easier to serve.
Quick Tip:
For the best flavor and texture, prepare these cups a few hours ahead of serving.
Pro Tips for the Best Oreo Dessert Cups
These simple tips will help you create smooth layers, better texture, and a dessert that looks like it came from a bakery.
Use Fine Oreo Crumbs
Make sure the Oreo cookies are crushed into small, even crumbs. Large pieces can make the crust uneven and harder to scoop.
Soften Cream Cheese Before Mixing
Room-temperature cream cheese blends smoothly and prevents lumps in the filling.
Do Not Overmix the Whipped Cream
Fold the whipped cream gently into the cream cheese mixture to keep the filling light and fluffy.
Cool Melted Chocolate Before Adding
Warm chocolate can soften the creamy layer underneath. Let it cool slightly before creating the chocolate layer.
Create Clean Layers
Use a piping bag or spoon carefully when adding each layer for a neat, attractive appearance.
Chill Before Serving
The dessert needs time to set. A proper chill gives the cups a firmer texture and better flavor.
Common Mistakes to Avoid
❌ Crushing Oreos Too Coarsely
Large cookie pieces can make the base loose and uneven.
❌ Using Cold Cream Cheese
Cold cream cheese creates lumps and prevents a smooth filling.
❌ Adding Hot Chocolate Directly
Hot chocolate can melt the cream layer and mix the layers together.
❌ Overfilling the Cups
Leave enough space for toppings so the dessert stays neat.
❌ Adding Oreo Toppings Too Early
Whole Oreos can become soft if they sit in moisture for too long.
Smooth Oreo base
No lumps
Protect cream layers
Better texture
Easy Variations for Oreo Dessert Cups
One of the best things about these Oreo Dessert Cups is how easy they are to customize. With a few simple ingredient swaps, you can create different flavors for every occasion.
Chocolate Lover’s Oreo Cups
Add a layer of chocolate pudding between the Oreo crust and cream filling.
Tip:
Use dark chocolate pudding for a richer flavor or milk chocolate for a sweeter dessert.
Mint Oreo Dessert Cups
Replace regular Oreos with Mint Oreos and add a small drop of peppermint extract to the cream filling.
Tip:
Do not add too much peppermint extract because the flavor can become overpowering.
Birthday Cake Oreo Cups
Use Birthday Cake Oreos and add colorful sprinkles on top.
Tip:
Add sprinkles right before serving to keep their colors bright.
Peanut Butter Oreo Cups
Mix 2 tablespoons of peanut butter into the cream cheese filling.
Tip:
Use creamy peanut butter for a smoother texture.
Strawberry Oreo Cups
Add a layer of fresh chopped strawberries between the Oreo crumbs and cream filling.
Tip:
Pat strawberries dry before adding them to prevent extra moisture.
Golden Oreo Dessert Cups
Replace chocolate Oreos with Golden Oreos for a lighter vanilla cookie flavor.
Tip:
Pair with white chocolate drizzle for an elegant finish.
Chocolate
Extra rich layers
Mint Oreo
Fresh cookie twist
Birthday Cake
Fun party style
Peanut Butter
Creamy nutty flavor
How to Store Oreo Dessert Cups
These Oreo Dessert Cups are a great make-ahead dessert because they stay creamy and delicious when stored properly.
Refrigerator Storage
Cover each dessert cup with plastic wrap, a lid, or store them in an airtight container.
They will stay fresh in the refrigerator for up to 3 days.
Best Texture:
The first 1–2 days give the best balance because the Oreo base stays slightly crunchy while the cream filling remains smooth.
Keep Oreo Toppings Fresh
If possible, add whole Oreos, cookie crumbs, and chocolate decorations close to serving time.
This keeps the toppings crisp instead of soft.
Making Ahead for Parties
You can prepare the main layers a day before your event.
For the best presentation:
- Make the crust and filling ahead
- Chill overnight
- Add whipped cream and Oreo decorations before serving
Can You Freeze Oreo Dessert Cups?
Yes, you can freeze Oreo Dessert Cups, but the texture may change slightly after thawing.
The cream layer can become softer, and whipped cream may lose some volume.
For freezing:
✔ Cover cups tightly
✔ Freeze for up to 1 month
✔ Thaw slowly in the refrigerator before serving
For the best creamy texture, fresh refrigerated dessert cups are recommended.
Frequently Asked Questions About Oreo Dessert Cups
Can I make Oreo Dessert Cups ahead of time?
Yes, these dessert cups are perfect for making ahead. You can prepare them several hours before serving and keep them chilled in the refrigerator until ready to enjoy.
For the best appearance, add the final Oreo cookie topping close to serving time.
Can I use Cool Whip instead of whipped cream?
Yes, Cool Whip or another whipped topping works well in this recipe. It makes the dessert quicker and easier while still keeping the filling light and creamy.
Can I make Oreo Dessert Cups without cream cheese?
Yes, you can replace cream cheese with vanilla pudding, mascarpone, or extra whipped cream. However, cream cheese gives the dessert a richer cheesecake-style texture.
How do I prevent the Oreo base from becoming too soft?
Avoid adding too much butter to the cookie crumbs. Also, add decorations like whole Oreos just before serving to keep them crunchy.
Can I use different Oreo flavors?
Absolutely. You can use Golden Oreos, Mint Oreos, Peanut Butter Oreos, or Birthday Cake Oreos to create different versions of this dessert.
How long do Oreo Dessert Cups last?
Stored properly in the refrigerator, they stay fresh for about 3 days. The texture is best during the first two days.
Can I make this dessert in a large dish instead of cups?
Yes, you can prepare this recipe in a small glass baking dish or trifle bowl. Simply layer the ingredients the same way and chill before serving.
Why is my Oreo filling too runny?
A runny filling usually happens when the cream cheese is too warm or the whipped cream was not whipped enough.
Yes, prepare hours before serving.
Yes, it works perfectly.
Keep chilled up to 3 days.
Yes, customize the flavor.
Final Thoughts
These Simple Oreo Dessert Cups are proof that an impressive dessert does not need complicated steps or baking skills. With just a few simple ingredients, you can create a beautiful no-bake treat filled with crunchy Oreo crumbs, creamy cookies-and-cream filling, rich chocolate, and fluffy whipped cream.
The individual serving cups make this dessert perfect for parties, birthdays, holidays, and family gatherings. They are easy to prepare ahead, simple to customize, and always a favorite with both kids and adults.
Whether you keep the classic Oreo flavor or try a fun variation like mint, peanut butter, or birthday cake, these dessert cups are guaranteed to bring a delicious finishing touch to any occasion.
Prepare them, chill them, and enjoy every creamy, chocolatey spoonful of this easy homemade treat.
20 Minutes
Prep Time
1 Hour
Chill Time
6 Cups
Servings
Easy
Difficulty
• 3 tablespoons melted butter
• 8 ounces cream cheese, softened
• ½ cup powdered sugar
• 1 teaspoon vanilla extract
• 1 cup heavy whipping cream
• ½ cup melted chocolate or chocolate ganache
• 1 cup whipped topping or extra whipped cream
• 6 whole Oreos for topping
• Mini chocolate chips or Oreo crumbs (optional)
For the cleanest layers, chill each dessert cup properly and add the final Oreo topping just before serving.